Brother Printer Settings for Check-In
Before you use TouchPoint Check-In for the first time, you will need to set your printer settings for the size labels you are using. The following steps are for Windows 10. Depending on your computer and printer, these screenshots may appear a bit different for you, but the settings should be basically the same.
Whoever handles the IT needs at your church should have no problem setting up the printers.
If you have not purchased printers yet, take a look at our Hardware List.
Important
Do not wait until the morning you plan to use check-in to set this up and test your printer. Perform the testing several days in advance, so you are certain everything is set up correctly. You want your members to have the smoothest experience possible, especially that first morning.
- Step 1
Find the Brother printer on each Check-In PC with a printer attached, by going to Start > Settings > Devices > Printers & scanners.
- Step 2
Click on the Brother printer and then click Manage.
- Step 3
Click on Printer preferences.
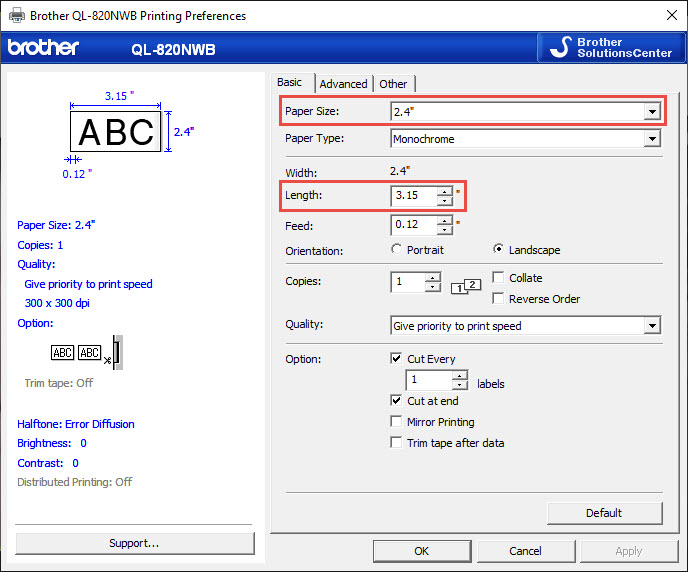
This will open the dialog box for you to edit the size for the labels.
For Brother DK-2205 labels, set the Paper Size to 2.4” and the Length to 3.15. Leave everything else set to the default settings.
For Brother DK-2223 labels, set the Paper Size to 1.9” and the Length to 3.14. Leave everything else set to the default settings.
- Step 4
Click OK when you are finished.
See also
Latest Update |
7/11/2024 |
Added link to Troubleshooting article