Txt2Give Integration - Allowing Giving by Text
Through our integration, donations made through Txt2Give are automatically recorded in your TouchPoint database. If you do not already have an account with Txt2Give, you will need to establish one at https://txt2give.co.
Setup for the Txt2Give Integration
To link your Txt2Give account to your TouchPoint database, you will need to create a special user account with appropriate roles and then configure a few settings in your Txt2Give account.
If you like, you can review the setup process in this step-by-step video:
You can follow the instructions below, or the slightly more detailed instructions provided by Txt2Give at http://help.txt2give.co/integrations/connecting-touchpoint-txt2give.
- Step 1
Add roles.
Go to Admin > Advanced > Lookup Codes and, from the Miscellaneous panel, click Roles. If they are not already in your database, add the roles APIOnly and APIWrite.
- Step 2
Add a Person.
Add a new Person record, giving it the name
Txt2Give User. You can leave address and all other details blank. After creating the record, go to its System tab, User Account sub-tab, and click on the Add User button. Give the account the user name oftxt2giveand the roles APIOnly and APIWrite.You will now need to contact TouchPoint Support, requesting that the Developer role also be added to the new
txt2giveaccount.- Step 3
Configure Your Txt2Give Account.
Go to your Txt2Give Dashboard and open organization settings.
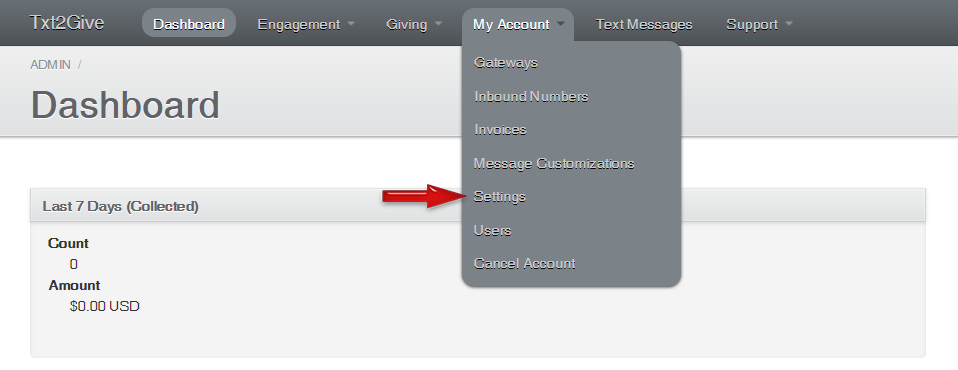
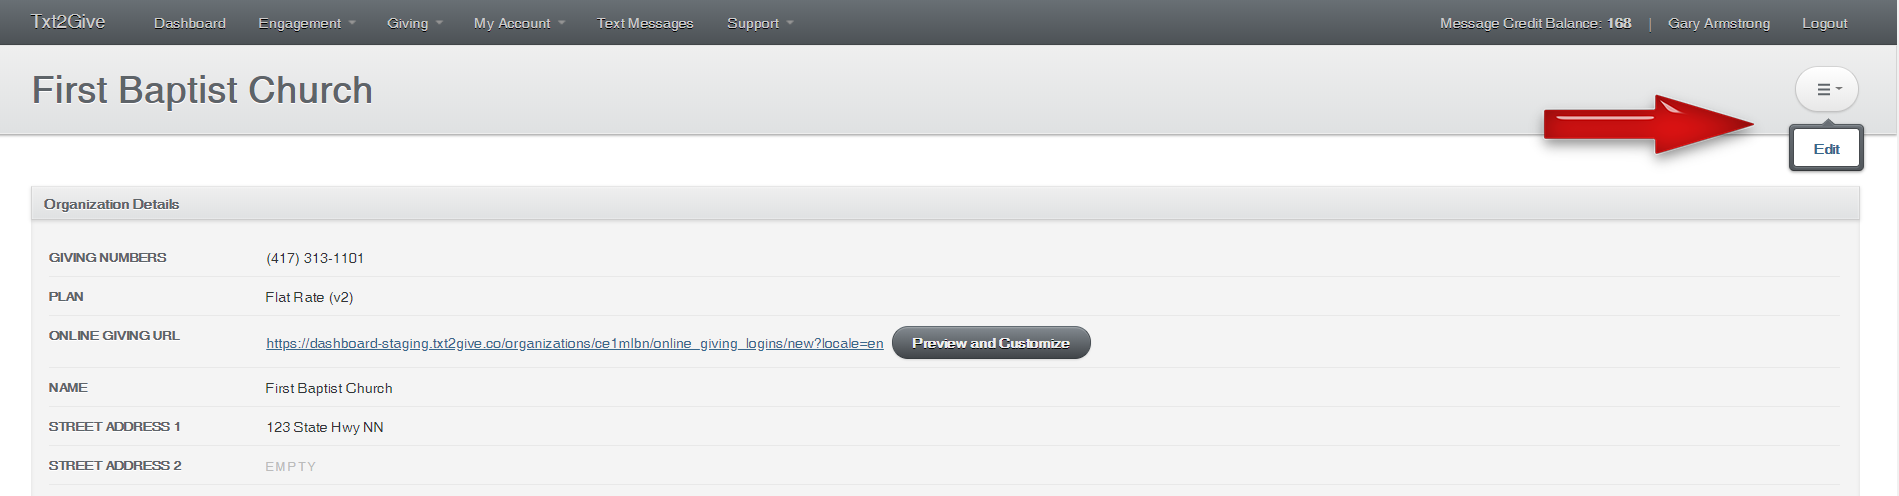
Then, in the top right corner, click the drop down menu and select Edit.
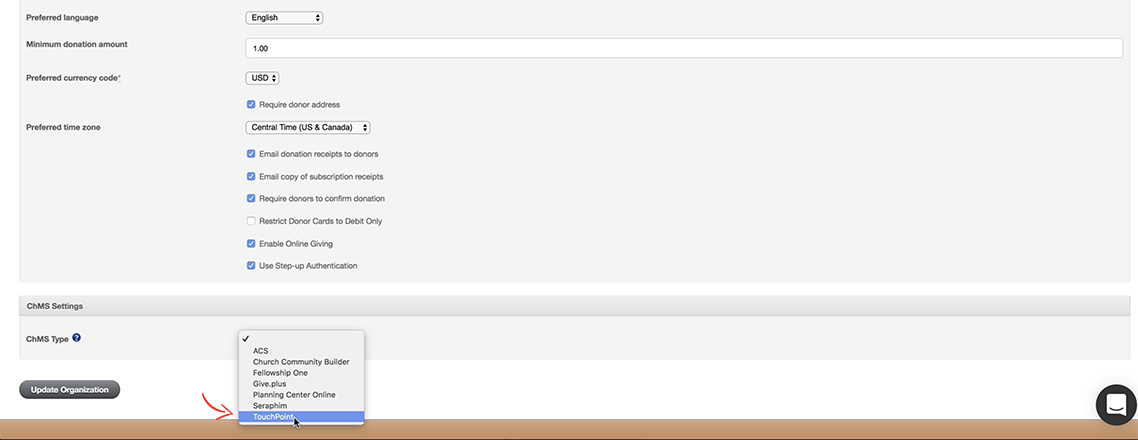
At the botton of the page, you’ll find the ChMS settings. Select TouchPoint and enter the username and password for the new TouchPoint user you created. When finished, click Update Organization.
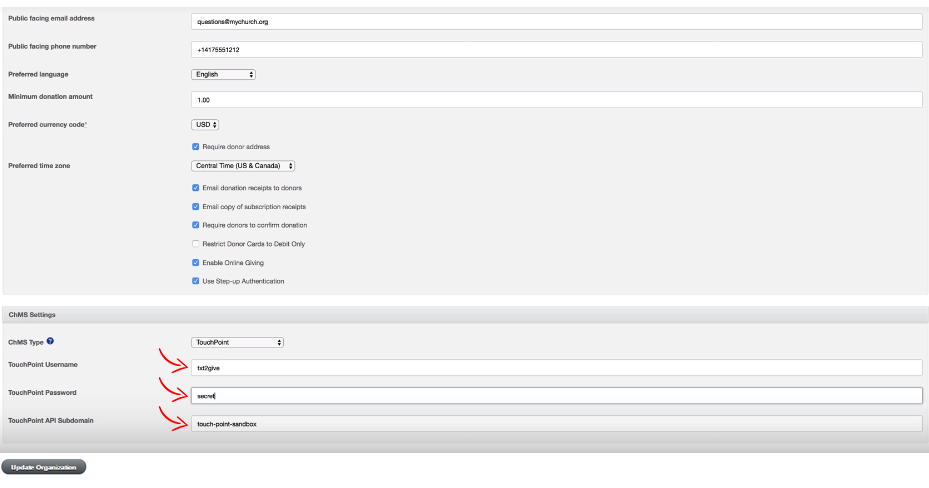
The TouchPoint API Subdomain is the church-specific part of your database URL (the part just before “.tpsdb.com”.) For example, for bellevue.tpsdb.com, the subdomain is bellevue.
After you have finished entering the TouchPoint details in the ChMS settings, click Save.
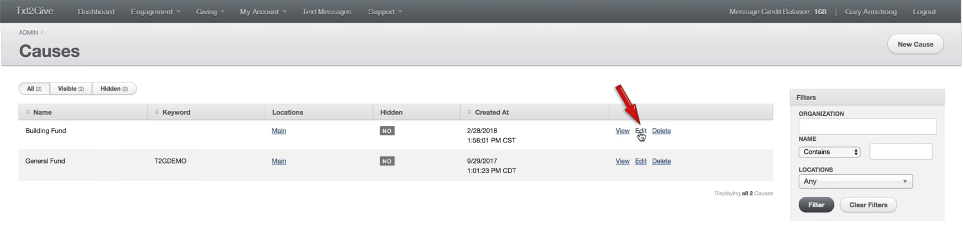
Now you need to link each of your Txt2Give Causes to the correct TouchPoint fund. Go to the Causes view by selecting Giving, then Causes.

For each Cause, click View:
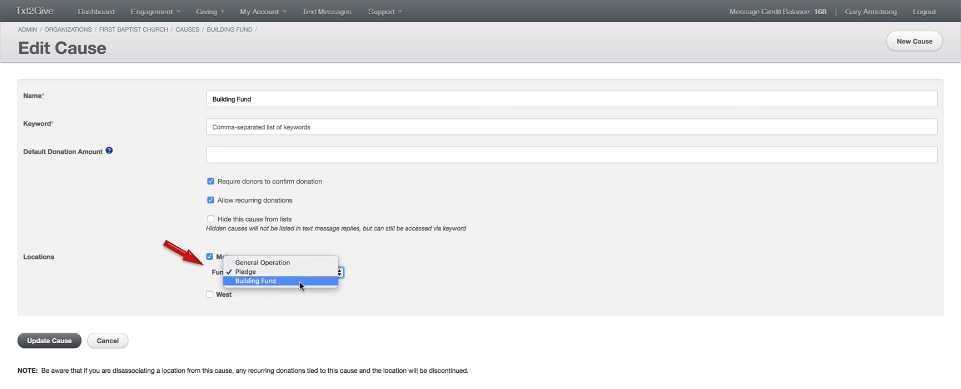
Under each Location checkbox, select the proper TouchPoint fund. If you don’t see any funds in the drop down, it likely means you’e either entered the TouchPoint username or password incorrectly, or you don’t have the proper roles set up in TouchPoint for the account you created earlier.
When finished, click Update Cause.
Important
Remember that when you add new funds in TouchPoint, you will need to create a new Cause in Txt2Give and link it to the TouchPoint fund before it will be available on Txt2Give.
When you have completed the setup, you can make a test donation to ensure everything works. Once you’ve made your donation, search for it in the TouchPoint database. Navigate to Finance > Search > Contributions and type
Meta:txt2givein the Notes field to filter for only Txt2Give donations.
Latest Update |
8/9/2023 |
Update navigation