Mobile App Push Notifications
Push notifications can be scheduled and pushed out to all the users of your mobile app. If you have multiple locations configured for your app, you can target a specific location. A limited set of replacement codes can be used to personalize the notifications.
Caution
Push notifications sent from TouchPoint depend on the backend provider Firebase Cloud Messaging, a service by Google. While the service is generally reliable, it is important to understand that Google does not guarantee delivery of all notifications. If you are sending vital messages, please consider sending the message through at least one other reliable medium.
Scheduling a Notification
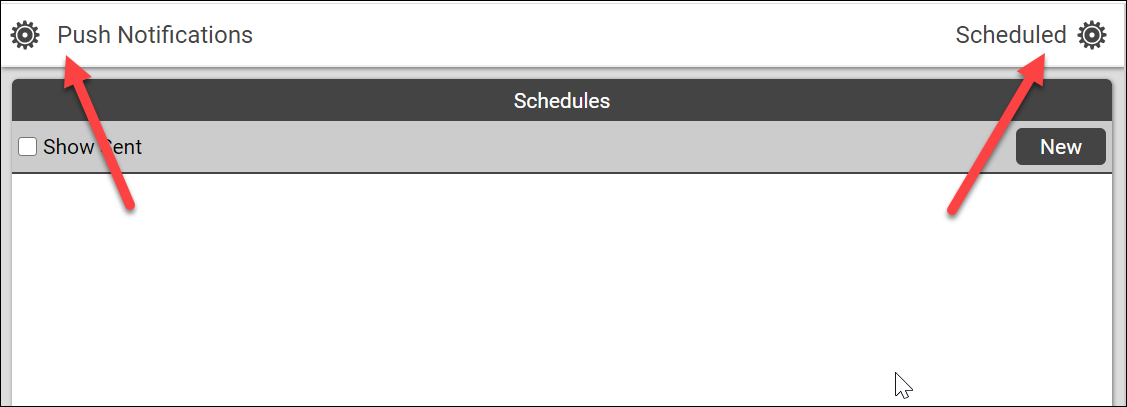
Notification composition and scheduling is done in the App Portal ( https://app.touchpointsoftware.com ). In the menu in the upper left corner, select Push Notifications. Then, from the menu in the upper right corner, select Scheduled.
Note
If you do not have the menu options shown in the screen shot above, please check the current version of your custom mobile app. It should be at least 2020.1.1 to use push notifications. If your app release is at or higher than this and you still do not have the menu option for Push Notifications, please contact Support.
To schedule a new notification, click the New button in the upper right corner.
Tip
If a notification draft has previously been created and you need to schedule it for delivery, it will be listed on the page. Locate it and click on the pencil icon to edit and schedule the draft.
In the New Notification Schedule dialog box, complete the following information:
Select a specific Location, if desired, or All Locations if the notification should go to all users of your app.
Set the Send date/time. The time should be at least five minutes in the future.
Enter a Name and Description. These are not seen by recipients of the notification. Their purpose is informational to help later to identify the message in the list of past notifications.
Enter a Notification Title and Notification Message. These will be seen by recipients.
If you want to save this as a draft, remove the check from the box by Send Notification and click Create. To schedule the notification, leave the checkmark for Send Notification and click the Create button.
Using Replacement Codes
If desired, you can include replacement codes in the Notification title or message. In the dialog box, the available codes are displayed to the right of the Message entry area. The available codes are:
{$person:name} The first and last name of the app user
{$person:first} The app user’s first name
{$person:preferred} The app user’s preferred (Goes By) name
{$person:last} The app user’s last name
Two additional replacement codes are for use with a future project for Discipleship Groups:
{$person:id} ID used with Discipleship Groups (d-groups) that does not necessarily correspond to the app user’s TouchPoint People ID or User ID
{$person:waitinglist} The app user’s waiting list name for d-groups
You can include in the replacement code alternate text to use if the field is missing. You do this
by adding a pipe character (|) after the field, followed by the alternate text. For example, if your
notification includes Hi, {$person:first|friend}!, the notification for a user with a first name of “Sarah”
on her record will see Hi, Sarah! while a user with no first name on record will see Hi, friend!
Using Deeplinking Fields
You can also use deeplinking fields in push notifications to take users into a specific location within the app. When you create the push notification, enter into the Link Path the path to the deeplink location. The user will be taken to this location when they tap on the notification.

Below are the link paths available:
/profile/information
/profile/family
/profile/involvement
/profile/giving
/giving/history
/registrations/landing
/registrations/register/<org id>
/tools/tasks
/tools/peoplesearch
/tools/attendance
/location/select
/location/view
See Mobile App Deeplinking for more information about deeplinking and where in the app the links above will take the user.
Latest Update |
11/13/2020 |
Modify image link with secure protocol.