24 Hour Prayer Grid
If you want to create an online registration so that people can select a time slot from a grid of slots spanning a 24 your period, submit a Support Request from your database and we will paste the necessary code into the organization you designate.
The prayer grid will present the days as a header row, with the times (each hour of the day beginning at midnight) as columns. Each day has 23 time slots.

Section of the Prayer Grid Registration
This is just a tiny section of the Questions tab when you are setting up a grid. All of the checkboxes will display on the Questions tab after you paste the code for you.
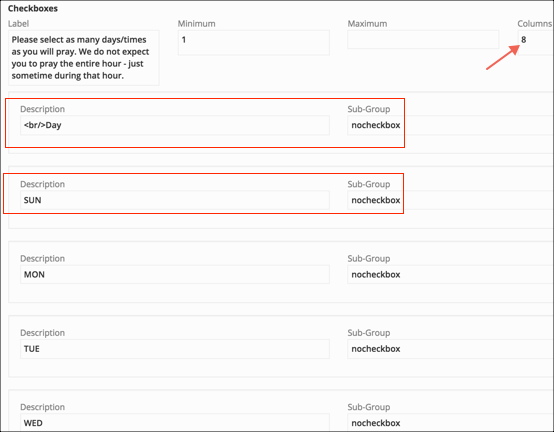
Questions
As you see, this is a much more complex set up than most online registrations. But, once you set it up it works great. Also, you will be able copy and paste the code into a new organization, if you have need for more than one prayer grid.
Creating a Second Prayer Grid
Part One - Copy the Code
You will be copying the code from the existing organization into a new organization. The user with Admin role must do this.
- Step 1
Go to the organization that is currently set up for a prayer grid.
- Step 2
Select the Gear icon on the blue Toolbar and then click the control key on your keyboard. This will now display a new option. Select View Registration Document.
- Step 3
Put your cursor in the box where you see the text, and use Control A to select everything, and then Control C to copy it.
Part Two - Past the Code
You should already have created the new organization at this point.
- Step 1
Go to the new organization and set the Registration Type to Join Organization.
- Step 2
While viewing the org, select the Gear icon on the blue Toolbar, and then press the Control key.
Now select View Registration Document.
- Step 3
Put your cursor at the top of the text currently displaying and then use Control V to paste all the text you copied into the Registration Document.
Look at the top of the text where you see <Settings id= and replace the number that you see after the = sign with the Org ID # for the new org.
Now click the blue Save button.
- Step 4
Go to the Messages tab and set the Online Notify Person and make any changes you want to the confirmation and instructions.
Note
If you have any problems with this, please submit a Support Request from your database.
Latest Update |
11/13/2020 |
Modify image link with secure protocol.