Multiple Dashboards
Widgets on your TouchPoint home page are a great way to give your users and admins a snapshot of important information they need to know. With the many Widgets available to be added to your TouchPoint Home Page, you may now decide to have multiple Dashboards to manage them all! Using some clever python scripting, you can now create individual Dashboards to be organized just the way you want. Follow these steps below:
- Step 1
To create new individual Dashboards, go to Administration > Special Content, then navigate to the Python Scripts tab.
- Step 2
Click the green New Python Script File button and use the Filename with the desired title for your new Dashboard.
- Step 3
Select and copy all of the code below and paste it into the new file you created. Make any edits, per the instructions below. Press the blue Save Python Script button at the bottom of your file.
- Step 4
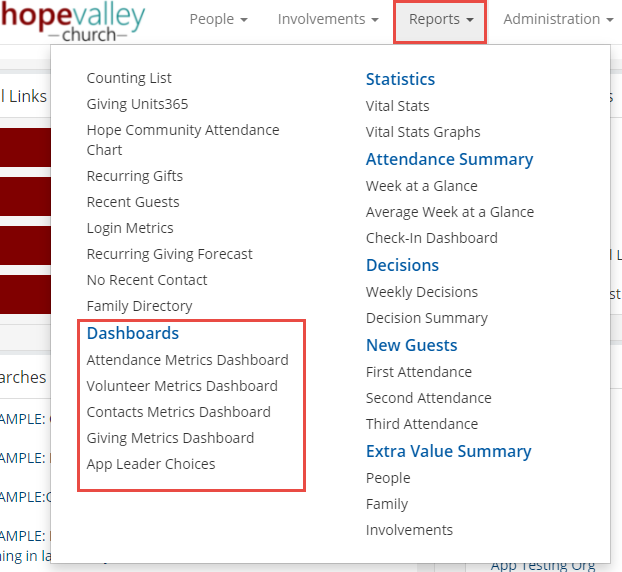
Now press Run Script. To add this Dashboard to the Reports Menu, press Add Report to Menu.
Repeat this process for all other Widgets you would like to add to your new Dashboard.
Editing the Code
As noted on line 7, you will need to modify the Widget HTML file for the widget to appear on the new Dashboard. You will need to
change class="box-title" to class="box-title visible-xs-block".
You can modify the title and subtitle of your new Dashboard on lines 103 and 104.
Your first opportunity to add a Widget is on line 122. A sample Widget called “Budget Comparison” is already coded as an example of the necessary syntax.
On line 122, add the name you gave the original Widget.
On lines 123 and 124, indicate the Widget ID. This ID can be found by navigating to the Widget from the Administration > Homepage Widgets page. Select the Widget you are adding to the new Dashboard and you will find the ID in the URL.
In lines 125, 126, and 129 input the name of the SQL file, HTML Content file, and Python file you’re using to create the Widget. Each of these files can be found on the Administration > Special Content page.
Note
Some widgets do not require a SQL file. If this is the case, comment out the SQL line by adding a “#” in front of the line.
New Dashboard Code
1 2 3 4 5 6 7 8 9 10 11 12 13 14 15 16 17 18 19 20 21 22 23 24 25 26 27 28 29 30 31 32 33 34 35 36 37 38 39 40 41 42 43 44 45 46 47 48 49 50 51 52 53 54 55 56 57 58 59 60 61 62 63 64 65 66 67 68 69 70 71 72 73 74 75 76 77 78 79 80 81 82 83 84 85 86 87 88 89 90 91 92 93 94 95 96 97 98 99 100 101 102 103 104 105 106 107 108 109 110 111 112 113 114 115 116 117 118 119 120 121 122 123 124 125 126 127 128 129 130 131 132 133 134 135 136 137 138 139 140 141 142 143 144 145 146 147 148 149 150 151 152 153 154 155 156 157 158 159 160 161 162 163 164 165 166 167 168 169 170 171 172 173 174 175 176 177 178 179 180 181 182 183 184 185 186 187 188 189 190 191 192 193 | # Indicate which roles you want to access this Dashboard. #roles=Access # Include CSS to make widgets work the same as on the homepage # NOTE: In order for this to work you have to change a class in the actual widget HTML file from: # class="box-title" to class="box-title visible-xs-block". This change is to the DIV surrounding the chevron and title seen on XS screens # CSS for list-group helps keep widgets with lists (e.g. birthdays) from growing in height when there are lots of rows page_style = ''' <style> @media (max-width: 765px){ .visible-xs-block { display: block!important; } .box-title.visible-xs-block{ display: block!important; } .box-title.hidden-xs{ display: none!important; } } .visible-xs-block { display: block!important; } .box-title.visible-xs-block{ display: block!important; } .box-title.hidden-xs{ display: none!important; } .list-group {max-height: 215px!important; overflow-y: scroll!important;} ul.nav li.visible-xs-block {display:none !important;} </style> ''' # Include javascript to make widgets work the same as on the homepage... including functions to redraw the widgets on page size change page_javascript = ''' <script async="" src="https://www.google-analytics.com/analytics.js"></script> <script type="text/javascript"> var WidgetCharts = {}; </script> <script type="text/javascript" src="https://www.gstatic.com/charts/loader.js"></script> <script src="https://ajax.googleapis.com/ajax/libs/jquery/1.11.2/jquery.min.js"></script> <script> $('.widget-embed').each(function () { var el = $(this); var url = el.data('url'); el.addClass('loading'); $.get(url, function (data) { if (data.includes('Error:')) { el.removeClass('loading').addClass('error'); el.html("<div class='box'><div class='center bg-warning text-warning'><i class='fa fa-3x fa-exclamation-circle'></i><p style='text-align:center;'>Error loading " + el.data('name') + "<br />Contact your system administrator</p></div></div>") } else { el.html(data); el.removeClass('loading'); } }).fail(function () { el.removeClass('loading').addClass('error'); el.html("<div class='box'><div class='center bg-warning text-warning'><i class='fa fa-3x fa-exclamation-circle'></i><p style='text-align:center;'>Error loading " + el.data('name') + "<br />Contact your system administrator</p></div></div>") }); }); $(window).resize(function () { if (this.resizeTO) clearTimeout(this.resizeTO); this.resizeTO = setTimeout(function () { $(this).trigger('resizeEnd'); for (var widget in WidgetCharts) { WidgetCharts[widget](); } }, 200); }); // handle google chart resizing $(window).on('resizeEnd', function () { for (var widget in WidgetCharts) { WidgetCharts[widget](); } }); </script> ''' pageheader ='<div id="home" class="row">' pagefooter = '</div>' colheader = '<div class="col-sm-4">' colfooter = '</div>' widgetclose = '</div>' #Now we start the actual code for printing the elements of the page. This starts with style and javascript followed by the "page" header. #The "home" div is needed to make the report act like the homepage widgets print page_style print page_javascript print '<head><title>Page Title</title></head>' print '<H3 align="center">Header</H3>' print pageheader # Column 1 print colheader # Column 1 - Widget 1 #Now we include all of the information relative to a specific Widget within the Column if (model.UserIsInRole("Edit")): #If structure is only needed if this widget is further restricted from the general report Role permission #Define WidgetName, WidgetID to be used in the HTML file #Define the SQL and HTML content that will be used in the Widget #You can get this info from the Homepage Widget Admin Screen #Then print an opening DIV with class "widget-embed", call the Python script for the widget itself and finally close the Div by printing widgetclose Data.WidgetName ='Budget Comparison' Data.WidgetNumber = '21' Data.WidgetId = 'widget_21' Data.SQLContent = model.Content('WidgetGivingToBudgetComparisonSQL') Data.HTMLContent = model.Content('WidgetGivingToBudgetComparisonHTML') #Make sure you adjust the Div in this file. print '<div class="widget-embed" data-url="/HomeWidgets/Embed/'+ Data.WidgetNumber + '" data-name="' + Data.WidgetName + '">' print model.CallScript("WidgetGivingToBudgetComparisonPython") print widgetclose # Column 1 - Widget 2 # Column 1 - Widget 3 print colfooter # Column 2 print colheader # Column 2 - Widget 1 if (model.UserIsInRole("Edit")): #If structure is only needed if this widget is further restricted from the general report Role permission #Define WidgetName, WidgetID to be used in the HTML file #Define the SQL and HTML content that will be used in the Widget #You can get this info from the Homepage Widget Admin Screen #Then print an opening DIV with class "widget-embed", call the Python script for the widget itself and finally close the Div by printing widgetclose Data.WidgetName ='Birthdays' Data.WidgetNumber = '1' Data.WidgetId = 'widget_1' # Data.SQLContent = model.Content('WidgetGivingToBudgetComparisonSQL') Data.HTMLContent = model.Content('WidgetBirthdaysHTML') #Make sure you adjust the Div in this file. print '<div class="widget-embed" data-url="/HomeWidgets/Embed/'+ Data.WidgetNumber + '" data-name="' + Data.WidgetName + '">' print model.CallScript("WidgetBirthdaysPython") print widgetclose # Column 2 - Widget 2 # Column 2 - Widget 3 print colfooter # Column 3 print colheader # Column 3 - Widget 1 # Column 3 - Widget 2 # Column 3 - Widget 3 print colfooter print pagefooter |
Latest Update |
8/11/2022 |
Fix extra search button