Small Group Finder Step 1 - Create the Involvements
If you have not read the Overview about how the Small Group Finder works, you will want to do so before proceeding.
See also
Create the Involvements
You can use existing Involvements or create new ones. Each Involvement that you want to display must be in a common Division and should have the following elements:
- Leader
A Leader is a member of the Involvement that has a Member Type matching the Leader Type of the Involvement. This is so the Leader’s name will display along with the name of the class.
- Location
The location is set in the Settings > General tab of the Involvement. This is a room number or the name of the location, such as Midtown Coffee House or John and Mary Smith’s home.
- Description
The Description is also on the Settings > General tab. See below for instructions in embedding a link to a map in the description and the Tip for editing descriptions from the Involvements > Search page.
- Extra Values
If you want filters, such as an age range, that will display on the finder, you will need to add Extra Values to each Involvement. See below for instructions for creating these.
Create Extra Values
To create the Filters (Extra Values) on each Involvement:
- Step 1
Go to Settings > Extra Values on each Involvement.
- Step 2
Click Show Ad Hoc Values then click + Add Extra Value button.
- Step 3
Select Multi-Line Text, enter the Field Name you want to display, using a prefix of SGF: - ex. SGF:Gender (Only the name will display, not the prefix.)
Enter the Value - ex. Coed
Click Save
Continue adding Ad Hoc Extra Values on each Involvement for each Filter.
Allowing Online Registration
If you decide to allow online registration (the text for the Layout includes the link), remember to set up the Involvement with Registration Type of Join Involvement. Add the Confirmation Email and all the other elements for a normal online registration. Also, if you prefer to add registrants as Prospects instead of Members, check that box on the Registration > Registration tab, in the Join Type section.
Put the Involvements in the Same Division
Make sure that all of the Involvements you want to present in the Small Group Finder are in the same Division. You can create a new Division just for these Involvements. Or, if they are already in the same Division and if you are planning to display all of the Involvements in that Division, you can use the existing one.
If you want to display all the Involvements in several Divisions, they do not have to be in the same Division. You will be able to enter all the Division ID # separated by a comma when you get to Step 4.
Now, you just need to find the Division ID#. This is the number you will put in the XML file when you create it, so make a note of it.
To find the Division ID#, go to Administration > Divisions. The Division ID is the number in the column on the left.
Map
If you would like to include a map in the description of the small groups, here is what you will do for each Involvement.
- Step 1
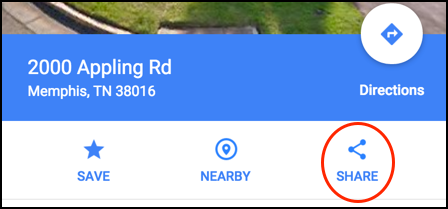
Go to Google maps, enter the street address and search.
- Step 2
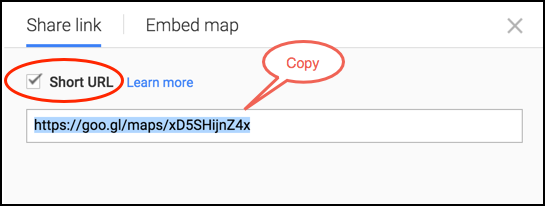
Click Share.
Check the Short URL box and then copy the link.
- Step 3
Go to the Involvement Settings > General tab and click Edit then click Edit by the Description. This opens the same text editor used when creating an email, so you can format the text using the toolbar.
Under the regular class description, type
Click for map, highlight the text, select the link icon from the toolbar and paste the link in the URL box. Then click OK.Click Save in that text editor, then click Save for that tab.
Note
You can also insert the map link by editing the description as described in the Tip above.
Tracking Attendance for Small Groups
The Small Group Finder is using Involvements inside TouchPoint. Therefore, you will track attendance just like you would for any other Involvement. If these small groups meet in homes, the leader will probably want to track attendance using the TouchPoint App on their iPhone or Android.
If the groups meet at the church, you can use rollsheets or even self-checkin. The key to remember is that these Involvement are just like any other Involvement in TouchPoint.
See also
Continue Setting up the Small Group Finder
Latest Update |
**106/27/2024* |
Update menu locations, changed orgs to involvements