Dymo Printer Settings for Check-In
While TouchPoint Check-In does work with Dymo printers, we do not recommend you using these, due to the cost of labels. However, should you choose to use a Dymo, below are steps for setting it up.
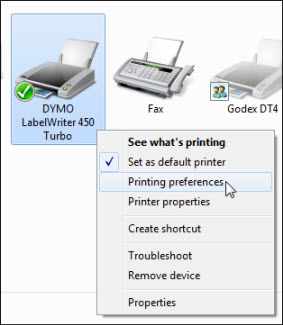
- Step 1
On your PC, go to Start > Devices and Printers. Then right-click on Dymo printer and select printing preferences.
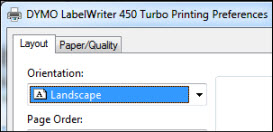
- Step 2
On the Layout tab, select Orientation > landscape
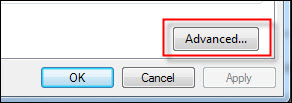
- Step 3
Click Advanced in the bottom right
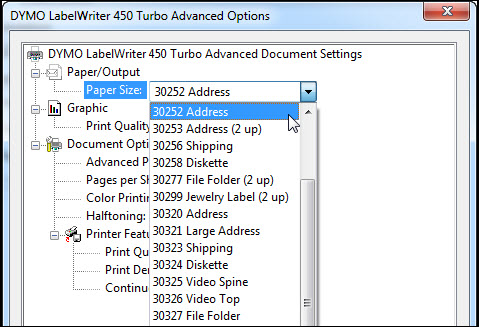
- Step 4
From the Paper size drop down, choose the correct label size. This number should be listed on the outside of the Dymo Label box. The two most common labels are the:
White Address Label - 30572 or the 30252 (3 1/2” x 1 1/8”)
White Shipping Label - 30573 or the 30256 (2 1/8” x 4”)
Note
If the formatting of information printing on your labels seems incorrect (too much room or not enough room), try a different label option. If your security code boxes are all black and won’t show the numbers/letters, adjust your TouchPoint Print Server margins. Add a 0.2 left and right margin, then click UPDATE and restart the Print Server Service to test again.
- Step 5
Click OK on that advanced page, and then OK on the next page.
See also
Latest Update |
7/3/2026 |
Fixed extra space typo