Scanning Checks to Import Data and Images
You can scan checks to upload contributions and images directly into TouchPoint using the Epson CaptureOne TM-S1000 Multi-Feed Check Scanner. Currently this is the only scanner supported for direct input into TouchPoint.
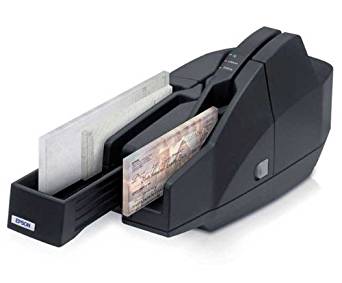
CaptureOne TM-S1000 Multi-Feed Check Scanner
Note
You can purchase the scanner at https://touchpointsoftware.unilinkinc.com.
Once you create your own username and password, you will have access to purchase either a new or refurbished scanner. The refurbished scanner is a great option for those who want to save money and still have a reliable scanner. The refurbished scanners are tested and certified to work properly, and they come with a 2 year manufacturer warranty.
Once your account is created, you will also receive an email with instructions for uploading your tax documents if you are ordering from a Tax Exempt Organization.
Requirements
The TouchPoint Check Scan application requires Windows 7 or later. It is not supported on earlier versions of Windows OS or on Mac OS.
Setting Up the Scanner
Beyond the basic installation of the scanner on your computer, a few additional steps are required to enable communication with your TouchPoint database.
- Step 1
Install the Scanner and Driver
Follow the instructions that came with the TM-S1000 to install it on your computer. Optionally, you may need to install a driver. Click here to download the driver. Extract the driver from the .zip file and launch the setup file in the Driver folder to install. After installing the driver, restart the Windows OS.
Note
You may not need to install the driver. The correct driver may already be installed by following the TM-S1000 installation instructions. However, after installing the Check Scan application, if it fails to run, install the optional driver above.
- Step 2
Install the TouchPoint Check Scanner Software
Go to https://www.touchpointsoftware.com/checkscanner/. Click the green Download Now button to download the installer.
Once the installer is downloaded, double-click to run it and it will open the TouchPoint Check Scanner setup wizard. Follow the prompts to complete the installation process. A shortcut icon will be created in your Start Menu and on your Desktop named TouchPoint Check Scanner, with the TouchPoint logo.
Note
The current version of the TouchPoint Check Scanner is 1.0.6. You will find the version number in the titlebar of the check scanner application.
Older versions of the TouchPoint Check Scanner required 32-bit Java in order to function properly. Version 1.0.6 has been converted to a .NET application and no longer requires Java. For this reason, the installer will not upgrade previous versions. If you have a version prior to 1.0.0 installed, you can uninstall it after installing 1.0.5.
- Step 3
Sign In
When you first launch the software, you will need to enter your church’s server, along with your TouchPoint username and password. The server is the church-specific part of the URL used to access your database, the part that precedes
.tpsdb.com.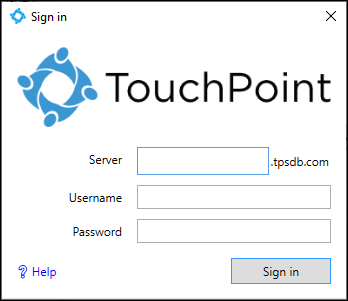
TouchPoint Check Scanner Sign In
Each time you launch the software, you will need to sign in with your TouchPoint username and password. After signing in, your name and server will display at the top of the Check Scanner window.
Important
The account used to sign in to the application must have either the Finance or the FinanceDataEntry role. The password for the account must not include a colon (:).
Scanning Checks
We recommend you scan your checks in small batches. That way, if something else comes up needing your attention, you can quickly wrap up your work. For security purposes, the scanned images are not stored on the PC. So you will want to upload all the checks you have scanned before closing the application.
Note
The scanner’s manual states that up to 100 documents can be put in the auto sheet feeder. If the attached PC has limited memory, you may need to reduce this number.
Parts of the process happen with your scanner and within the TouchPoint Check Scan application. Other parts of the process are accomplished within the TouchPoint database.
- Step 1
Begin by creating one or more bundles within the TouchPoint database, assigning to them the desired default fund. It will be important to have these bundles already created later in the process, when you will upload the check information and images into an existing bundle.
- Step 2
Working in the “New” Tab
Insert a handful of checks into the scanner’s auto sheet feeder. The front of the checks should be facing outside, away from the scanner. When you are ready, click the Start Scanning button in the top, right corner of the Check Scan application window. As the checks are scanned, thumbnail images will appear in the left panel of the application.
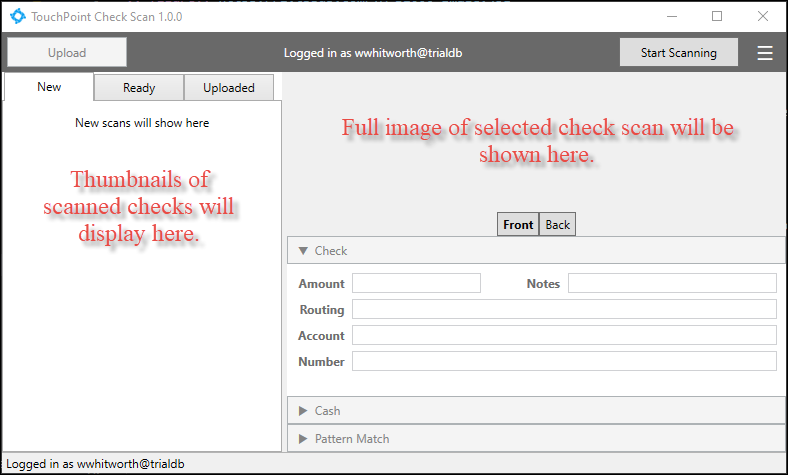
The TouchPoint Check Scan Window
When the current handful of checks have been scanned, you will process each scan by clicking on its image in the left panel. When you click on a thumbnail image, the full image will appear in the top, right panel and its information will be displayed in the bottom, center panel in the Check section.
In the Check section, enter the amount of the check. If the software did not detect the routing number, account number, or check number, you can add them here. Then press Enter. As you complete this step for each of the scanned checks, they are moved to the Ready tab.
If a check shows a warning icon beside it, it means the check scanner did not read the MICR line correctly. When this happens, pattern matching is disabled, since it would be bad data.
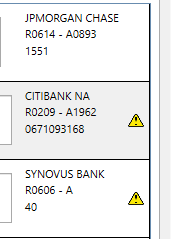
Check Warning
Note
If the software did detect the routing number, account number, and check number, but placed them in the wrong fields, you can expand on the Pattern Matching section and choose the correct number for each from the dropdowns. Once those are correct, enter the Bank Name and click the Save button. This will upload a new pattern so that future checks from this bank are scanned correctly. Patterns are stored in a file named
CheckPatterns.jsonunder Administration > Setup > Special Content > Text Content.Tip
You can right-click on a scanned check in the New tab to see options for Delete and Delete All. This can be useful if you are just testing the scanner or if you make a mistake and want to remove a single or all scanned checks from the list.
- Step 3
Working in the “Ready” Tab
As items are added to the Ready tab, you will see at the top of the tab the number of items and the total amount of all the checks that on now on that tab.
To transfer the items in the Ready tab into the TouchPoint database, click the Upload button in the top, left corner of the application window. This will present the Upload Scans dialog box. Select the desired bundle from the drop down list. The list will include all Open bundles in the database. Or, you can select (Create a new bundle) to create a bundle with the default fund. (The default fund is defined in the system by the administrative setting
DefaultFundId.)When the bundle has been selected, click Upload on the dialog box. The check information and images on the Ready tab will now be transferred to the TouchPoint database.
- Step 4
Working in the “Uploaded” Tab
The Uploaded tab will show the image thumbnails for the checks that have been uploaded and will indicate the bundle in which they have been placed.
- Step 5
Back in the TouchPoint database, examine the bundle(s) to which checks have been added and associate donor names with any unassigned entries. You will only need to do this the first time you have imported a check for a particular bank routing/account combination. Thereafter, the donor’s name will automatically be assigned. You will also need to ensure the correct fund is set for each entry.
You can click here for detailed instructions for Assigning Donor and Fund for your bundle entries
Tip
Once you have all the information in your bundle and the bundle has been Closed, you can use Scan and Deposit to perform a remote deposit to the bank. For more information, see Scan and Deposit.
How to Handle Bank Drafts
Most churches will have some donors who direct their bank to mail you a check. If you have more than one donor using the same bank (which will probably be the case), all the checks will have the same account number. Because the scanned checks depends on matching the account number with the donor, you must handle these bank drafts differently.
When you scan the first bank draft (online bill pay) check, make sure to save the check pattern. After scanning the checks, you will need to update the contributor in the batch that is created.
Over time as you scan more bill pay checks from the same recurring donors, the batch will offer a list of contributors to choose from to associate with the payment based on previous gifts.
Important
Remember, all of these types of bank checks that are issued from the same bank will have the same account number, so the last person you associate with that account will be the one that will display the next time you scan this type of check from that specific bank. So, you will always need to follow these procedures with bank drafts, in order to associate those checks with the correct donor. Once you associate the contribution with a donor, it stays on that donor’s record, even if that account number for that bank gets associated with another donor.
Latest Update |
7/10/2026 |
Added note with link to purchase scanner