Manage Volunteer Calendar - Simple View
Under the blue Toolbar > Gear > Administrative are the following 2 options relating to managing a Volunteer Calendar:
Volunteer Calendar - the original view that is described in the other help articles
Simple Volunteer Calendar - this view is a more streamlined version, but the functions are all there. You just access them differently.
Important
This is merely a different way of viewing and managing the calendar and it is available for any Volunteer Calendar. It does not require any special set up or settings. Also, you can move back and forth between the original view and the simple view. Both are options under the blue Toolbar > Gear > Administrative section.
Instead of the calendar displaying the weeks on the left of the page, they are across the top and display only a month at a time. You can easily scroll left or right to see the previous or future month using the arrows at the top of the calendar. The time slots for the Meetings are down the left side.
In the header, All Weeks is the default, which displays all weeks for the current month. Click the arrows to scroll to the next month. If you want to see only one week of the month for the entire date range (First and Last Meeting Dates), select week number in the header. The display will show only 4 slots at a time going across the page. To scroll, simple click the arrows.
Also, another difference is that the list of volunteers is not automatically shown. The list displays when you perform a specific function, such as Add Volunteers as described below.
Below is the view you will see when you select Simple Volunteer Calendar.
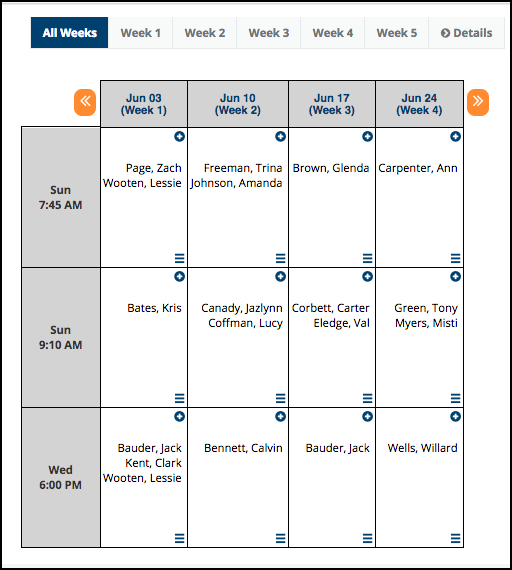
Initial Simple Calendar View
For the original view see the help article below.
See also
Add Volunteers to the Calendar
You have 2 options.
- Option 1 - Add to Specific Weeks for Every Month
Click the Details toggle to the right of the header to view the grid of weeks. See the image above. This will open the grid showing the Weeks at the top and the day/times on the left. There is also a slot for All Weeks for each day/time.
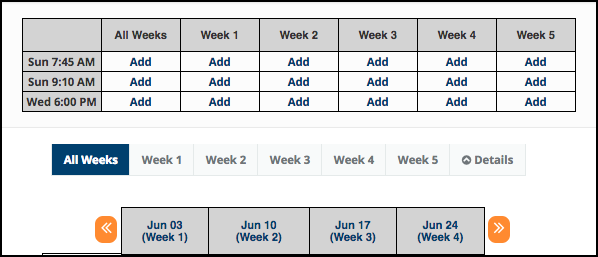
View Details
Click Add in the appropriate week/time slot. This will display all volunteers in one of two columns: With Commitments or With No Commitments. The radio button for the Week you selected will be checked. See image below. Sub-group filters are available if you are using sub-groups.
Select the volunteers you want and click the Add button. This will place the selected volunteers in the time slots for all months for the Week selected.
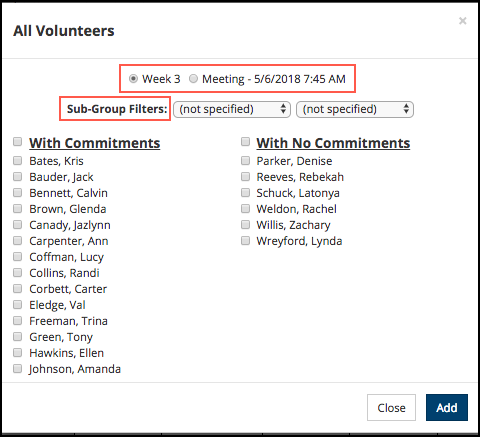
Add Volunteers View
- Option 2 - Add to Individual Meeting
Click the + symbol (to ‘add’) in the top right corner of the appropriate box (Meeting) on the calendar itself.
This opens the same view as above but with one difference. The radio button for the Week is not selected. Instead, the date for the one time slot/Meeting is selected.
Select the volunteers you want and click the Add button. The volunteers you select will be added just to that one Meeting, not for all Weeks.
Note: If you want to use this option and add the volunteers to all slots of a specific week number, just change the radio button selection to the Week instead of the one date.
Other Functions
Stacked Lines aka the Hamburger Icon
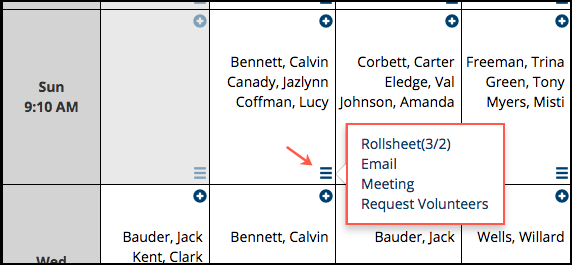
Hamburger Icon
Click this icon for the following options:
- Print Roll Sheet
When you select this option, only those volunteers committed for that date will display on the roll sheet. That includes anyone that is a sub for another volunteer. Anyone that has found a sub will not print on the roll sheet.
- Send Email
This will allow you to compose an email that will go only to those committed for that date.
- View Meeting
This takes you to the Meeting where you can record attendance, or manually change someone’s commitment.
- Request Volunteers
This opens the same page you would use to Request Volunteers from the original calendar view. You select those you want to email and can edit the email if necessary. Just do not edit the section containing the response links.
Volunteer’s Name
Volunteer Name Link
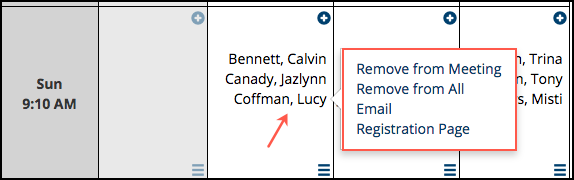
When you click someone’s name in the calendar, you have the following options:
- Remove from Meeting
This will remove their commitment for that one Meeting.
- Remove from All
This will remove their commitments for all Meetings.
This allows you to email just that one person.
- Registration Page
This takes you to the normal Registration Page where a volunteer manages his own commitments. A staff member can also manages commitments for a volunteer and has the option to send a confirmation email or not.
Header

Week View
This is where you can choose to view All Week or only Week 1, Week 2, for each month. There is also a toggle to view or hide Details which is used when adding volunteers to the calendar. See instruction above.
Other Indicators
This is how a volunteer’s name displays when he has requested a sub.
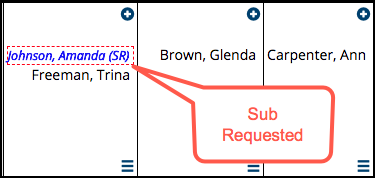
Sub Requested
This is how the 2 names display when a sub has been found.

Sub Found
When more volunteers are requested by the staff, the names of those that respond in the affirmative will display on the calendar just like any other volunteer that is committed, not like a sub. In this case, they are not taking anyone’s place, merely helping out because the team needs some extra volunteers.
Latest Update |
11/13/2020 |
Modify image link with secure protocol.