
Connect Card Templates
A card template describes one style of connect card your church prints. It tells TouchPoint which person fields — name, email, phone, address, and so on — and which extra values appear on the card, so that TouchPoint knows what to look for when it reads a card and the reviewer sees exactly those fields on the Card Review tab.
Create one template for each card your church uses. If you print a different card for a special event, give it its own template.
Templates are managed on the Templates tab of People > Connect Card.
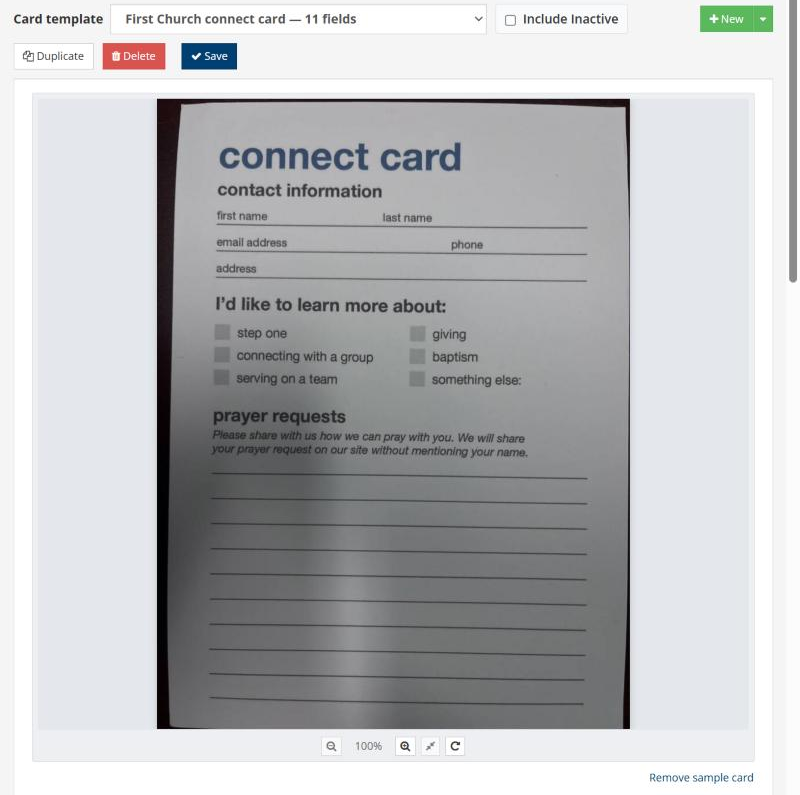
A template built from a scan of a blank card, with the sample card shown above the editor
Choosing a Template to Edit
Select a template from the Card template drop-down at the top of the tab. Each entry shows the template name and the number of fields it collects, and the default template is marked (Default). Inactive templates are hidden unless you check Include Inactive.
Creating a Template
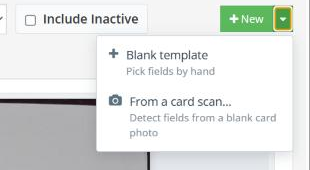
Click the arrow beside + New to choose how to start:
The two ways to create a template
Blank template — start with an empty template and pick the fields by hand.
From a card scan… — upload a photo or scan of a blank connect card (JPG, PNG, or PDF; only the first page of a PDF is used). TouchPoint analyzes the card and checks the person fields and standard extra values it finds printed on it, and suggests a template name based on the card’s title. Review the result, make any changes, and save.
Tip
When you build a template from a card scan, TouchPoint can only check extra values that already exist as standard People extra values. If your card asks a question that does not match an existing extra value, add it with Add extra value (described below) before you save.
A template built from a scan keeps the sample card on screen while you edit, with zoom and rotate controls, so you can compare the card with the fields you have chosen. Click Remove sample card to remove the sample from the template.
Template Settings and Fields
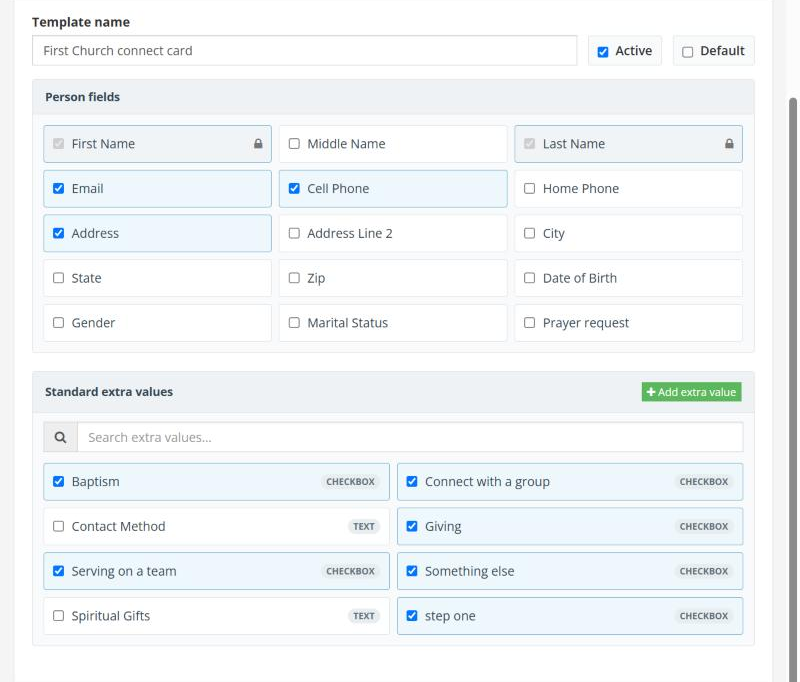
Template name, person fields, and standard extra values for a template
- Template name
Required, and must be different from every other template’s name.
- Active
Only active templates can be chosen when capturing cards.
- Default
Marks the template your church uses most often; it is labeled (Default) in the template list. Only one template can be the default, and it must be active.
- Person fields
Check each person field printed on the card. First Name and Last Name are always included and cannot be removed. The other fields are Middle Name, Email, Cell Phone, Home Phone, Address, Address Line 2, City, State, Zip, Date of Birth, Gender, Marital Status, and Prayer request.
- Standard extra values
Check each extra value the card collects, such as the boxes a guest can tick to learn more about baptism or small groups. The list shows your church’s standard People extra values of type Text, Checkbox, or Date, each labeled with its type. Use the search box to narrow a long list.
Adding a new extra value
If the card asks for something that is not yet an extra value, click + Add extra value. Enter a Name, choose a Type — Text, Checkbox, or Date — and save. TouchPoint creates a new standard People extra value and checks it on the template. Creating an extra value requires the Edit or Admin role.
See also
Click Save when you are done. A template can hold up to 100 fields.
Copying and Retiring Templates
Duplicate creates an editable copy of the selected template, named with Copy at the end. The copy is not saved until you click Save.
Delete deactivates the template after you confirm. A deactivated template no longer appears when capturing cards, but cards already captured with it continue to review normally. To use it again, check Include Inactive, select the template, check Active, and save.
Latest Update |
10/07/2026 |
Created article for the new Connect Card feature.