Media & Resources
Media & Resources allow you to provide announcements, documents, audio or video links, and other resources for your people. These are made available on a Resources tab on a person’s record and they can be accessed by anyone with at least a MyData account. Access to each resource is controlled by restriction options, using the following criteria:
Membership in a specified Involvement
Membership in an Involvement of a specified Involvement Type
Having a specified Member Type(s)
Having a specified Status Flag
Being in a specified Campus
Enabling & Configuring Resources
To enable Resources on your database, navigate to Admin > Advanced > Settings > Features > Resources. Toggle the Resources- Enabled value to True.
To configure Resources on your database, navigate to Admin > Communication > Media & Resources. This option is only visible to users with the Admin or ManageResources role.
Note
The ViewResources role allows a user to see the resources on another person’s profile. This is useful for testing and troubleshooting, allowing you to verify that resources have been made available to a particular person. Assign it to anyone who needs to test and troubleshoot Resources.
Media & Resources Page Breakdown
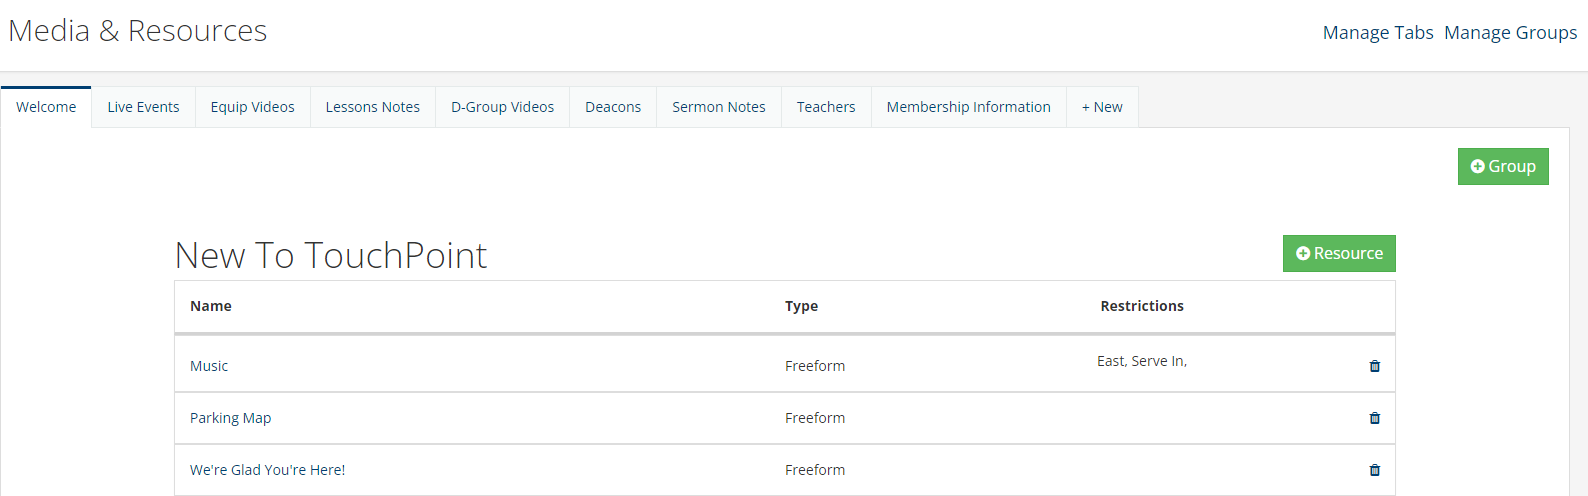
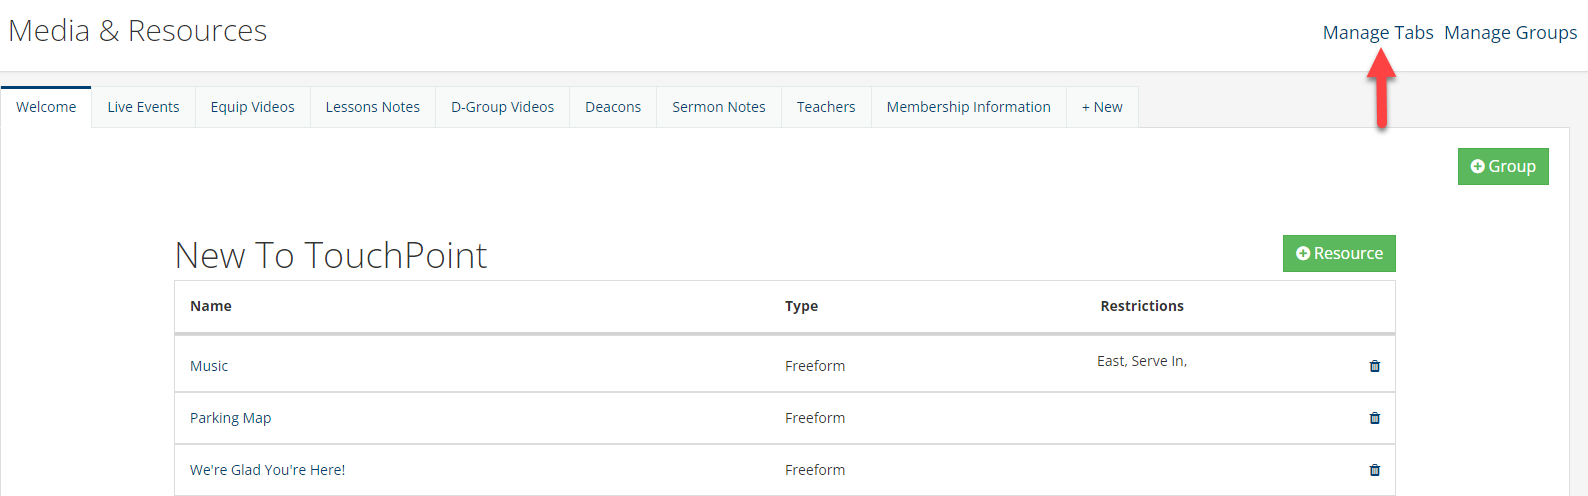
This is the main page where you will add, manage, and choose restrictions for your resources. The page layout is broken down into these sections:
Create Tabs
Create a Group
Add a Resource
Manage Tabs
Manage Groups
Create Tabs
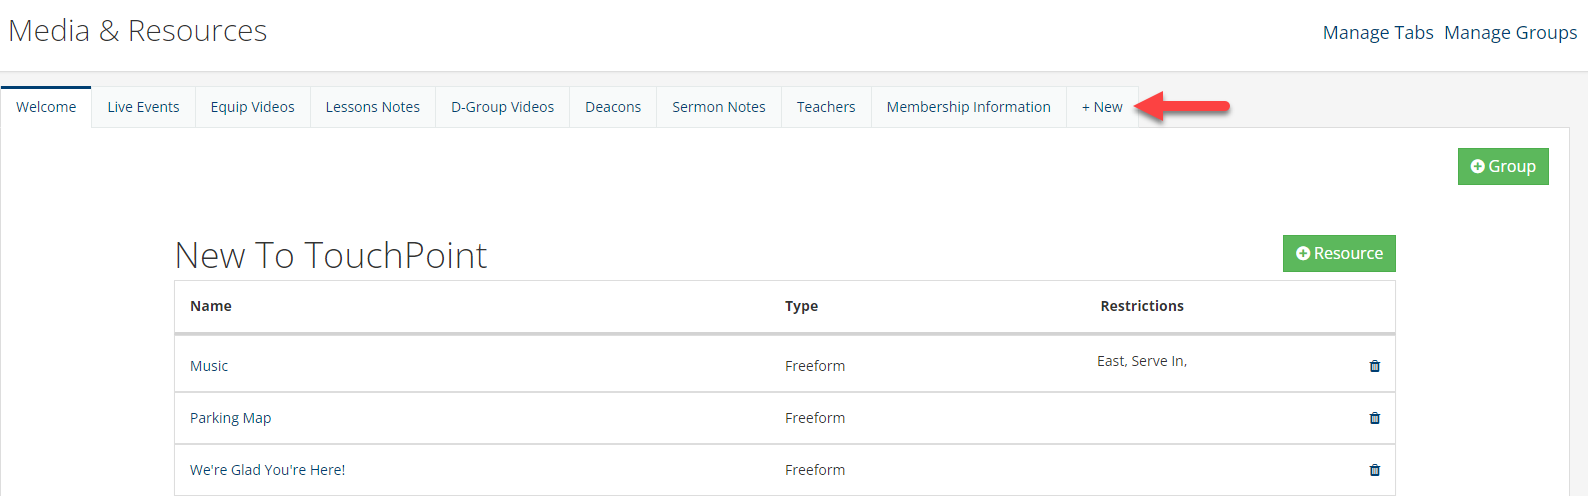
Tabs will display horizontally at the top of the page. To create a new tab, click the +New tab, type in the name which could be a type of resource or the audience you are engaging with, and then click the Create button.
Create a Group
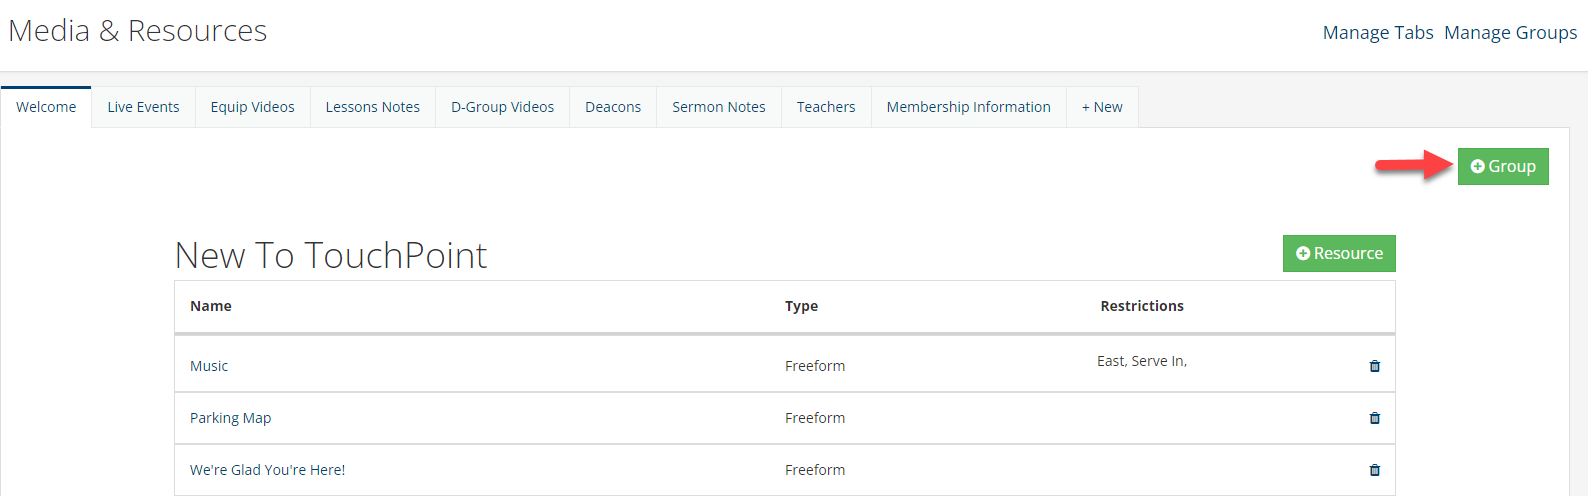
To create a Group, you first will want to select the tab you want to add the Group to on the top of the page and then click the green +Group button to create a Group. This creates a Group section under the selected tab where you can categorize your Resources.
Add a Resource
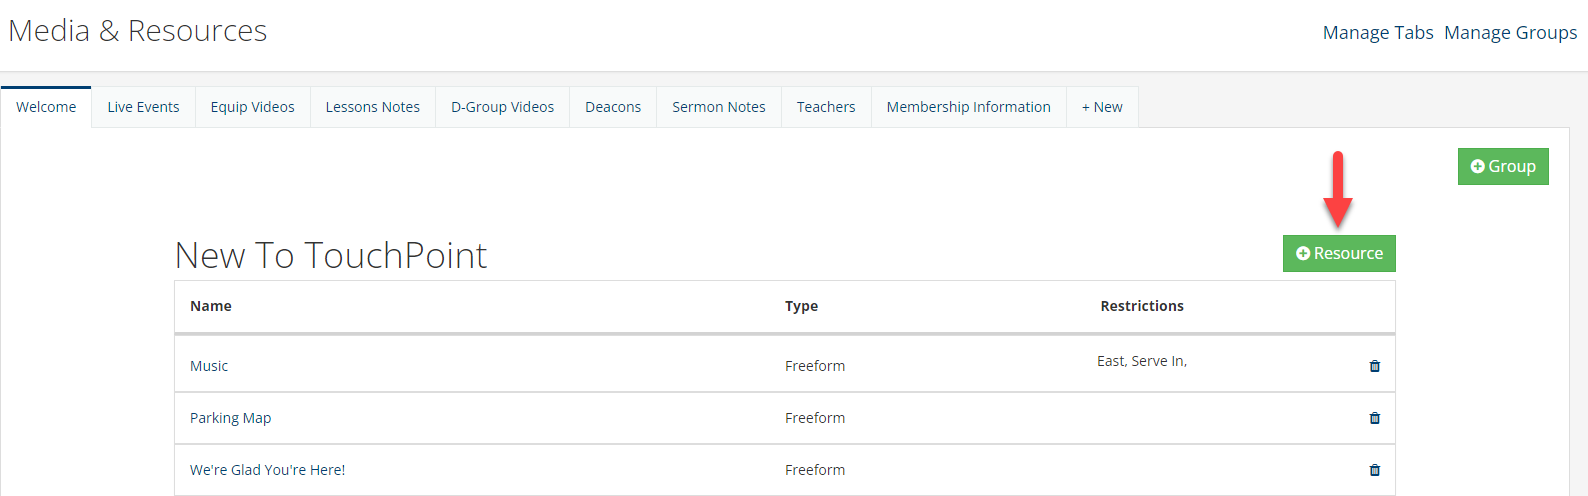
Under each Group, you will see the green +Resource button where you can name and add them to the group. After you name the resource and click Create, a popup will open where you can add the resources and are provided various options.
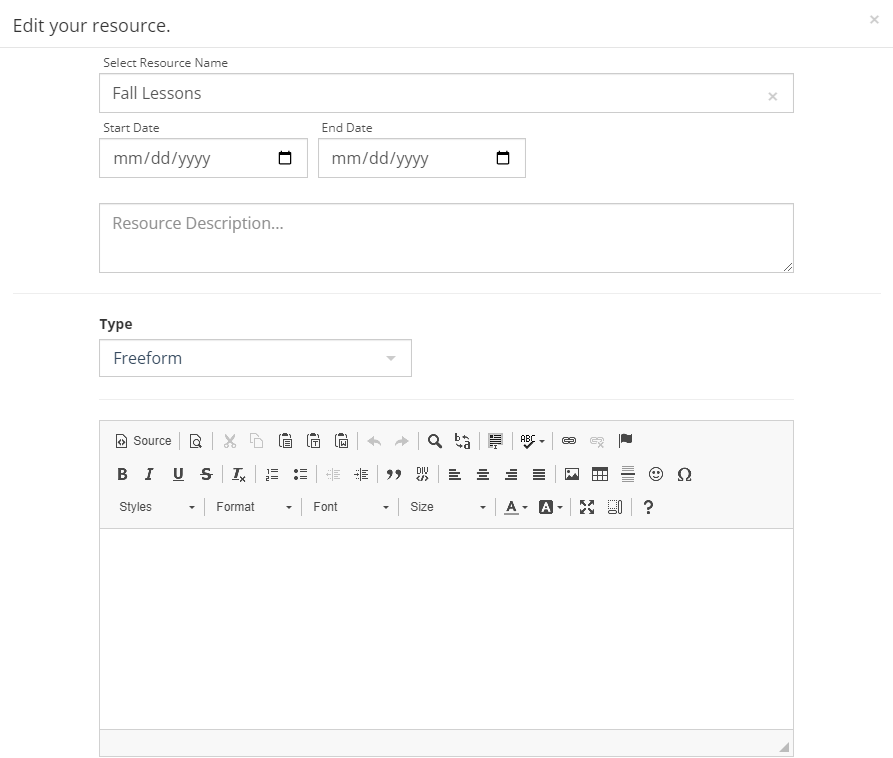
Start/End Date - Hide a Resource if it’s outside of the Start Date and/or End Date. If these don’t exist, the Resource will be visible.
Resource Description - Option to include a description of the resource.
Type - Below are the various types of resources that can be created:
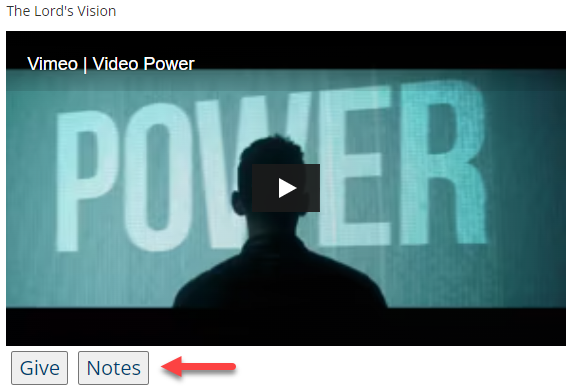
- Audio: Add the Hosted Audio File URL and add a Speaker and Date- Freeform: Use our freeform option which includes the similar option box seen when creating emails- Livestream: Add the livestream URL with additional options to include a Giving URL and/or Sermon Note URL. Using the Giving URL or Sermon Note URL will populate the “Give” and “Notes” buttons below the Video or Livestream file which will direct users to those pages.- PDF: Upload a PDF file with the max file size or 100,000 KB.- Weblink: Add the URL to the page of your choice.- Video: Add the video URL from any of these supported sources: m3u8, MP4, Vimeo, and YouTube.Note
For Vimeo and YouTube videos, the URL required must be a direct link to the video itself and the URL should not include additional information as if it were from a playlist or some grouping. Correct Example Link https://vimeo.com/(videoID) and this is the same for YouTube videos.
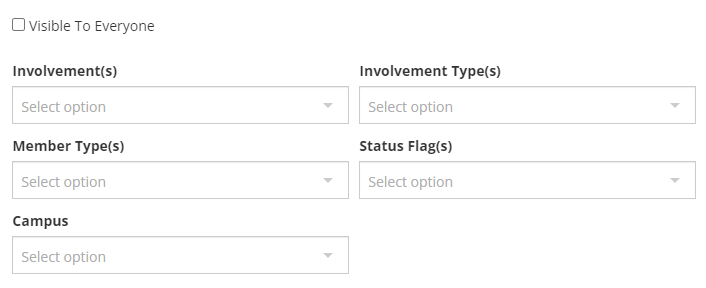
Visible To Everyone - This box will be checked by default and will have the resource visible to everyone if no restrictions are added.
Involvements - Select one or more involvements to limit the resource to members of the selected involvements. You can select the desired from the drop down list or begin typing the name of the involvement to quickly locate it.
Involvement Types - If you have defined involvement types on your database, you can specify one or more involvement types. The resource will be limited to the members of involvements that are of the selected involvement types. Select the desired types from the drop down list.
Member Types - Specify one or more member types to limit the resource to those who have the specified type(s). If you have also specified involvements, someone must have the specified member type in those involvements in order to access the resource.
Status Flags - If the options above are not sufficient to define who should have access to the resource, you can select one or more status flags. The resource will be limited to those who have the specified status flag(s). This will be further limited by settings in any of the other options.
Campus - If you have defined campuses on your database, you can specify one or more. The resource will be limited to people in that campus. Select the desired campus from the drop down list.
Manage Tabs
Clicking the Manage Tabs link will take you to the page where you can choose to change the name of the Tab, create their Display Order, or Delete them if needed.
Manage Groups
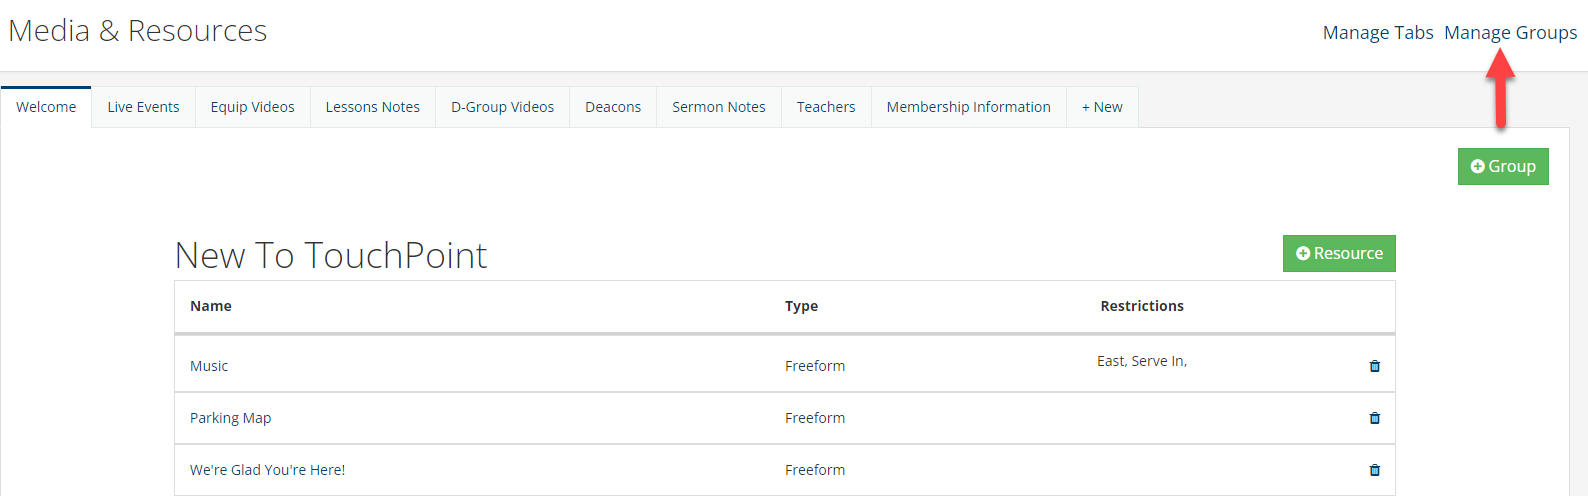
Clicking the Manage Groups link will take you to the page where you can choose to change the name of the Group, create their Display Order, select the Resource Tab they will be in, or Delete them if needed.
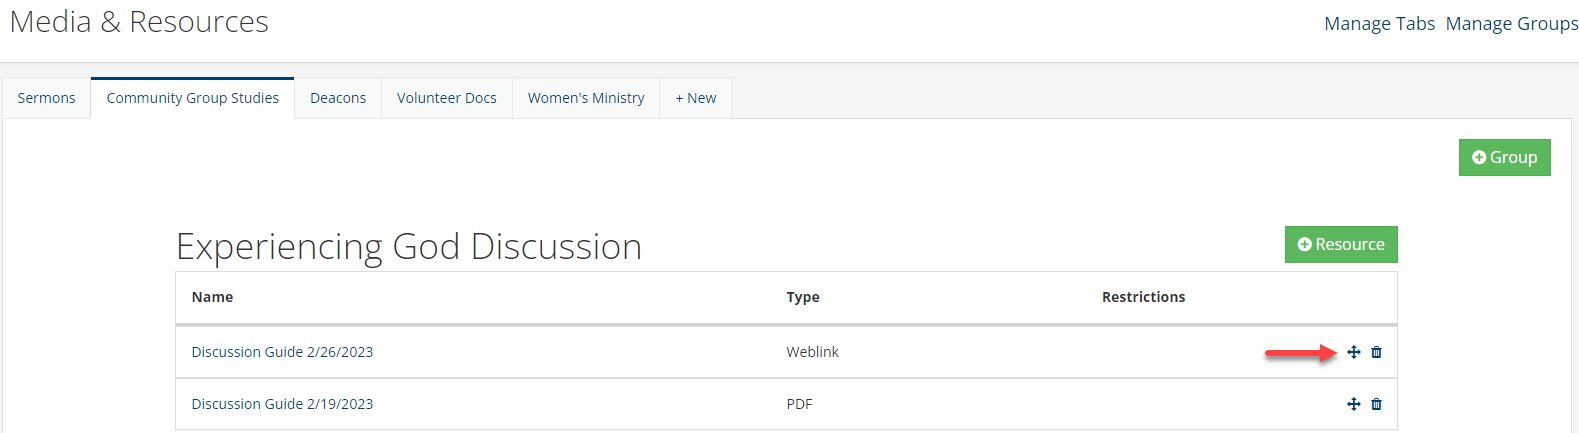
Organizing Resources
To change the order of the Resources within the group, you click and drag the Resource to the desired location in the list. You can also move a Resource to a different group by clicking the 4-arrow cursor.
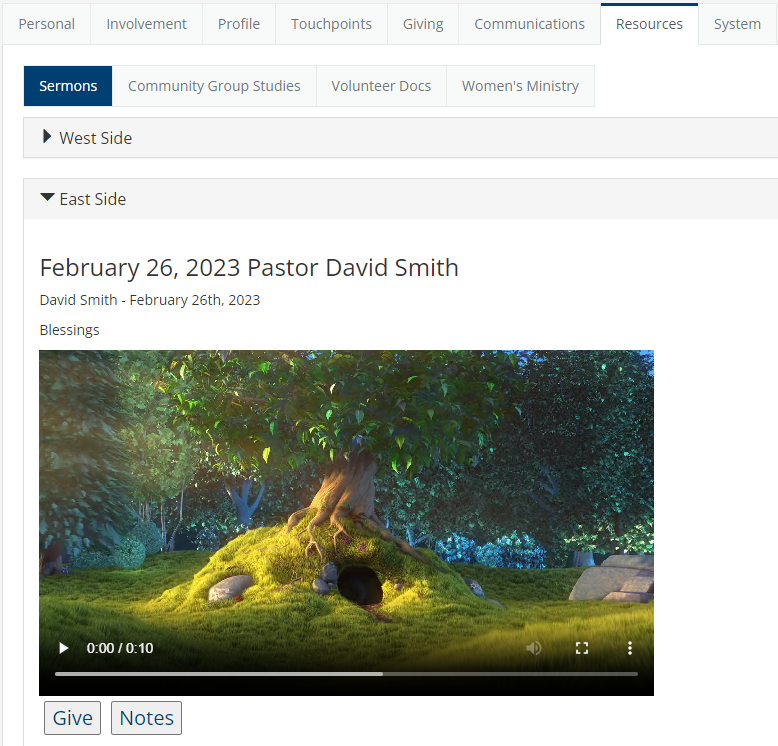
Viewing Resources
When resources are available for a user, they can be found in the web app on the Resources tab of that person’s profile. Within the Resources tab, there will be an embedded tab for each Resource Type for which that person has resources. Each Type tab will have sections for each Resource Group for which that person has resources. Expand the group label to see the available resources within it.
Resources are also available in the Mobile App in the following locations.
The hamburger menu in the upper right corner
The footer of the app on the Media icon
See also
Mobile App Setup, specifically the Media & Resources section.
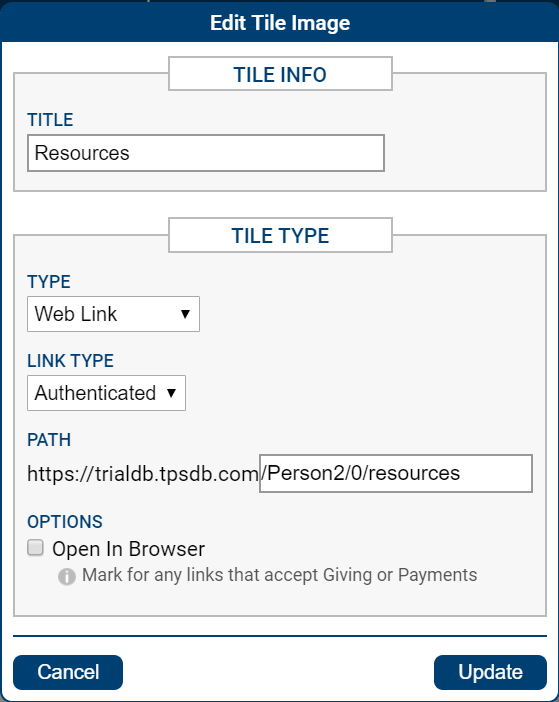
Making Resources Available on the 2.0 App
It’s easy to make Resources available for mobile app users. Configure a tile as an Authenticated Web Link.
Give the tile a Title of “Resources” or some other meaningful name.
Set the Type to Web Link.
Set the Link Type to Authenticated.
Enter /Person2/0/resources in the Path.
Save your settings by clicking the Update button.
Setting up Resources with an Authenticated Link
That’s it. When app users click on the tile, they will be prompted to enter their password again (for security purposes) and will be taken to their resources page.
Latest Update |
03/07/2024 |
Updated Resource URL’S