
Process Builder Actions
When building a process, you assign one or more actions to each step. Actions fire when a person reaches a step (or when the step’s When to Complete trigger is met). Each action has its own configuration details described below.
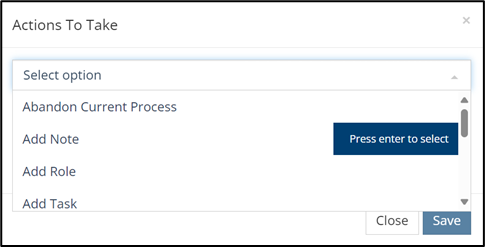
The action type dropdown showing all available actions.
Important
Three actions are not available on the initial Added to Process step: Abandon Current Process, Complete Current Process, and Move to Process. These actions are available only on subsequent steps.
Action Reference
- Abandon Current Process
No additional details are required. Ends the process for the person at the current step and marks them as Abandoned. Useful when a condition on the step (such as a search met or note added) should automatically remove the person from the process.
- Add Note
Creates a note on the person’s record, similar to adding one from the Tasks & Notes page. Configure the following:
Note Details – The content of the note.
Keywords – One or more keywords to categorize the note.
Owner – The person who owns the note.
Limit to Role – Restricts visibility of the note to the selected role.
Number of Days – The number of days from when the person reaches this step to set as the note’s event date. For example, enter
0for the same day,1for the next day, or7for a week out. Leaving this field blank means the note will not have a due date and will not appear at the top of the owner’s task/note list.
- Add Role
Assigns one or more roles to the person when they reach this step. Select the role(s) from the dropdown. This is useful for onboarding workflows, such as granting new staff their required roles.
- Add Task
Creates a task related to the person, similar to adding one from the Tasks & Notes page. Configure the following:
Task Details – A description of the task.
Keywords – One or more keywords to categorize the task.
Owner – The person responsible for the task.
Assignee – The person the task is assigned to.
Limit to Role – Restricts visibility of the task to the selected role.
Number of Days – The number of days from when the person reaches this step to set as the task’s due date. For example, enter
0for the same day,1for the next day, or7for a week out. Leaving this field blank means the task will not have a due date and will not appear at the top of the assignee’s task list.
- Add To Involvement
Adds the person to the selected Involvement. Type the Involvement name in the dropdown to search. If you need to add the person to multiple Involvements, create a separate action for each. You can optionally set a Member Type and Campus.
- Complete Current Process
No additional details are required. Ends the process for the person and marks them as Completed, with the completion date recorded. Use this action on your final step to indicate that the person has successfully finished the process.
- Move to Process
Transfers the person to a different process. Select the target process from the dropdown. The person is marked as Completed in the current process and is added to the selected process.
- Remove From Involvement
Removes the person from the selected Involvement. Choose the Involvement from the dropdown. If you need to remove the person from multiple Involvements, create a separate action for each.
- Remove Role
Removes one or more roles from the person when they reach this step. Select the role(s) from the dropdown. Useful for offboarding workflows, such as revoking permissions when someone leaves a position.
- Send Email
Sends an email using a pre-built template. Configure the following:
Email Template – Select the template to use.
Send From – Choose who the email is sent from (must have at least the Access role).
Number of Days – How many days after the person reaches this step to send the email. Enter
0to send immediately.Time – The time of day the email will be sent.
Important
The subject line of the email is the Title of the email template. If no title is entered on the template, a system-generated subject line is used.
- Send SMS
Sends a text message to the person. Configure the following:
SMS Group – Select the SMS group to send the text from.
Number of Days – How many days after the person reaches this step to send the text. Enter
0to send immediately.Time – The time of day the text will be sent.
Latest Update |
07/03/2026 |
Rewritten for clarity and consistency; added configuration details for Add To Involvement