
Using Process Builder
See also
This article walks through creating a process from start to finish: naming the process, configuring its initial settings, adding steps with triggers and actions, and publishing.
Creating a New Process
- Step 1 – Navigate to Process Builder
You must have the Admin or ManageProcesses role. Go to People > Processes and click the green +Process button.
- Step 2 – Name your Process
Enter a name for the new process. Names must be unique; there is no limit to how many processes you can create.
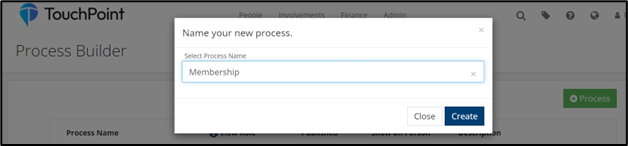
- Step 3 – Configure initial settings
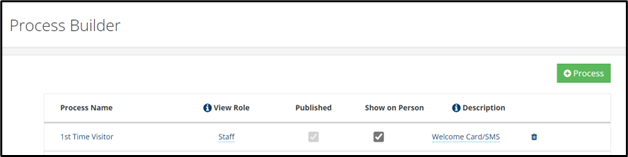
After the process is created, you can configure the following options on the process list page:
View Role – Click Select Role to restrict which users can see the process. If no role is selected, anyone with at least the Access role can view it.
Show on Person – Check this box to display the process status on each person’s record under Profile > Processes.
Description – Click Enter a Description to add a brief label (30 characters max).
Adding Steps
- Step 4 – Open the Process
Click the name of your process to open it. You will see two tabs: the People tab (where you manage who is in the process) and the Steps tab (where you configure the steps).
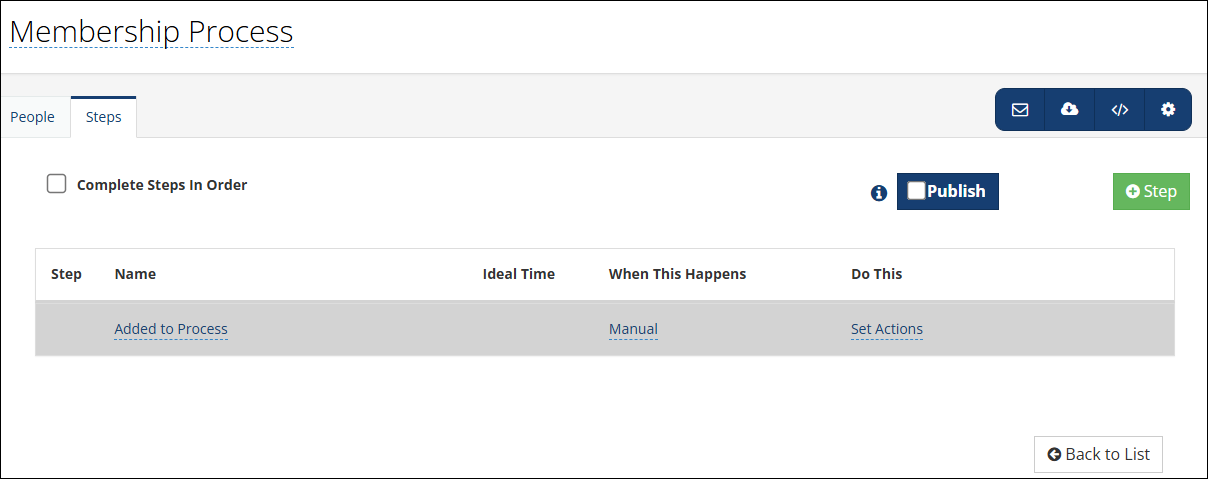
- Step 5 – Configure the initial step
On the Steps tab, you will see a default step called Added to Process. This step controls how people are initially added to the process. Click Complete under the When This Happens column to choose one of three triggers:
- Manual
You manually add people on the People tab.
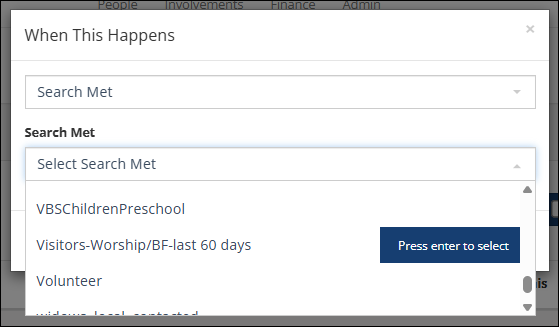
- Search Met
Choose a public SearchBuilder search. This search runs once daily as part of the morning batch; any person who meets the criteria is automatically added to the process.
Note
Useful examples include searches for first-time attendance at a certain event, recent first-time givers, new visitors, or notes containing a specific keyword.
See also
- Involvement Joined
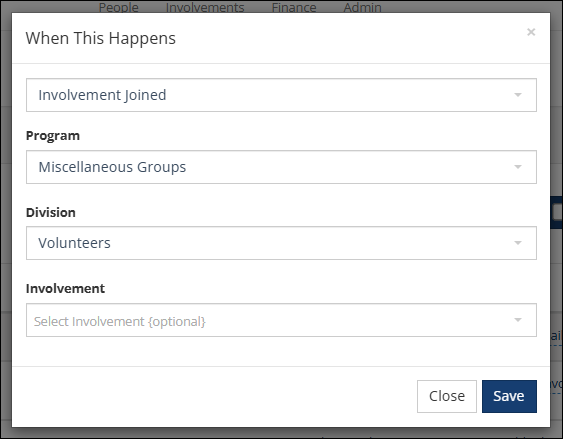
Choose a Program, and optionally a Division and Involvement. When someone is added as a member of the selected Involvement, they are automatically added to the process. This trigger is checked every hour.
Note
Useful examples include enrolling participants from a specific Bible study program or detecting new members of a mission trip Involvement.
- Step 6 – Add actions to the initial step
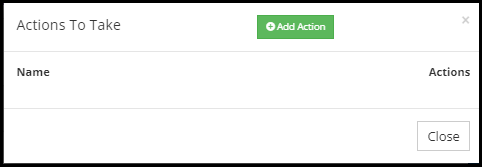
Click Set Actions under the Do This column, then click the green +Add Action button. Select an action type and fill in its details.
Important
Three actions are not available on the initial step: Abandon Current Process, Complete Current Process, and Move to Process. These actions apply only to subsequent steps.
Important
Actions on the initial step will not trigger the When to Complete criteria on future steps, with the exception of Task Assigned (as the action) paired with Task Completed (as the When to Complete trigger).
See also
- Step 7 – Add additional steps
Click the green +Step button and enter a name for the new step.
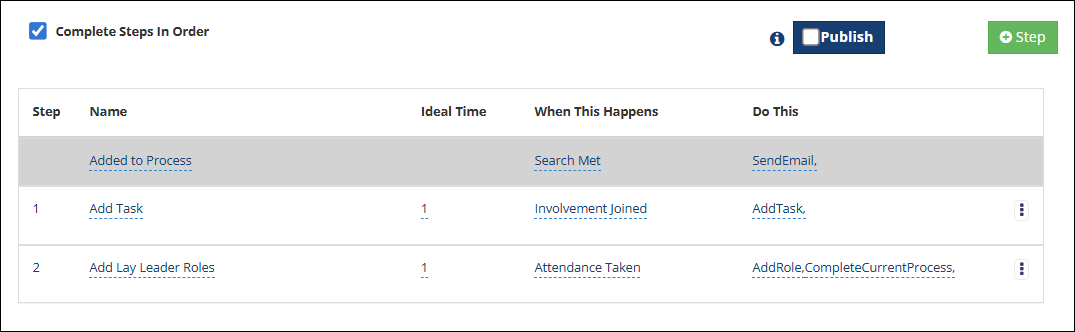
For each additional step, configure:
- Ideal Time
The expected number of days for the step. This setting does not affect the process or its data – it serves as a visual cue on the dashboard. If a person exceeds this timeframe, the Days count turns red, letting you see at a glance how long someone has been in a step.
- When to Complete
Click Complete and choose one of the following triggers:
Attendance Taken – Select a Program, Division, and/or Involvement. Checked twice an hour (at 20 and 40 minutes past the hour).
Involvement Joined – Select a Program, Division, and/or Involvement. Checked every hour (at 45 minutes past the hour).
Manual – Requires manual completion from the process dashboard.
Note Added – Select a Keyword. When a note with that keyword is added to the person, the step completes.
Number of Days/Hours – Enter the number of days or hours after the step begins. Checked every 15 minutes.
Question Answered – Select a mobile app question and answer. The step completes when the person provides the specified answer.
Search Met – Select a public search. Run once daily in the morning.
Task Completed – Select a Keyword. When a task about the person with that keyword is marked complete, the step completes.
- Do This (Actions)
Click Set Actions and add one or more actions. All action types are available on subsequent steps.
See also
Publishing Your Process
When all steps are configured, determine whether the process must be followed in order:
Complete steps in order – Check this option if people must complete each step sequentially. If left unchecked (the default), steps can be completed in any order, and anyone reaching a Complete Current Process action will finish the process regardless of whether earlier steps were completed.
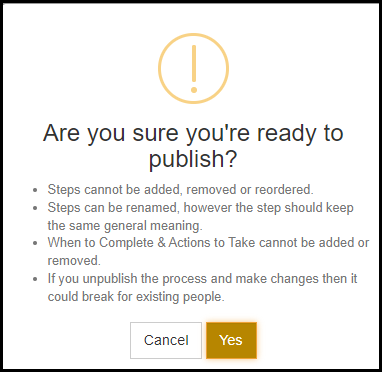
Click the blue Publish checkbox to publish. You will receive a warning pop-up – read it carefully, as changes to a published process can affect people already in the process.
Note
Deleting a process or a step removes all associated data for people in that process.
Once published, you can add people on the People tab by clicking the green +Add Person button. If the initial step uses a Search Met or Involvement Joined trigger, people will be added automatically on the configured schedule.
See also
Latest Update |
07/03/2026 |
Rewritten for clarity and flow and added Question Answered completion type.