Transactions (New)
TouchPoint offers a single page view of all transactions and contributions that have been made online or manually entered into batches. To activate this page, which combines the Transaction Log and the Contribution Search pages, navigate to Admin > Advanced > Settings > Finance > Online Giving and toggle the Show New Transactions In Menu setting to True.
Note
Once the setting is set to True, you will see Transactions Legacy, Contributions Legacy and the new page, Transactions under the Finance > Search menu.
Required User Roles
To see each of the following types of transaction data, certain user roles are required.
Online Registration Transactions - This includes all online registrations, with or without fees; but not any donations. It also includes manual transactions created for an online registration.
Admin AND EditORManageTransactionsDonations - These are either extra donations made during an Online Registration, or as regular online giving.
Finance
Mission Trip Support - To view and manage mission trip support donations.
MissionsGiving
See also
Information Displayed By Default
The Transactions page provides details about and filtering for registration payments and contributions. Below are the details provided by default. See the Additional View Options section for other options you can add to the view.

Blue Totals Bar - Total Amount of all the transactions, Total Count of transactions, how many Households are associated with the transactions, and the average amount paid per Household.
Date - This is date and time the transaction was made.
Name - This is the name of the person who made the payment for this transaction. It will display as they entered it. This may be different from the person registered for the event.
Info - Click on the “i” icon to see the following:
Transaction is paid Online or Offline (manually entered).
Status whether Pending, Settled, Void, Reverse, Refund, Failed, No Fee, or Discount Code.
Payment Type is Bankcard or ACH.
ID which is the TouchPoint assigned ID number. Click on the ID number to filter to all related transactions.
Transaction number which is assigned by the payment gateway.
Batch ID with a link to the batch where transaction is included. All Pending Bankcard and ACH transactions will link to the corresponding Pending batches until those transactions settle.
Status - Indicates whether the transaction is Pending, Settled, Void, Reverse, Refund, Failed, Adjustment, Discount Code, No Fee, or Offline. This data also provided under the Info “i” section.
Description - This is name of the Involvement for which the person registered. Click on the Description to link to the Registration History page which provides all the details about the registration.
Type - The characterization of the transaction, whether NC (Non Contribution associated with a registration), TD (Tax-Deductible payment), NT (Non Tax-Deductible payment), SC (Soft Credit), GK (Gift in Kind), or SK (Stock).
Fund/Account - If the payment was a Non-Contribution, the appropriate Accounting Code will be listed. If a donation/contribution (TD or NT), the fund name will be listed.
Amount - The amount of the transaction.
Actions - Click on the three dots to view additional options:
Void - Voiding of a transaction can only be done the same day as the payment, before the cutoff time. The cutoff time varies and specific to your church and gateway. Voiding a transaction will keep the transaction from settling and charging the giver. Only BANKCARD transactions can be voided. ACH transactions cannot be voided.
Refund - If you don’t see the Void option, then you are past the cutoff time (see Void above). Click on Refund to enter the amount you want to refund to the giver and then click Refund Transaction. Note: you can only provide one refund per transaction unless you use TouchPoint Giving. ACH transactions can only be credited (refunded) once the transaction has settled.
Adjustment - Can be used to increase or decrease the amount due for a registration. To increase the balance, use a negative number. To decrease the balance, use a positive number.
Reverse - Use this when you need to make a correction for a contribution/registration.
Additional View Options
From the View dropdown, you can opt to add more information to the report.
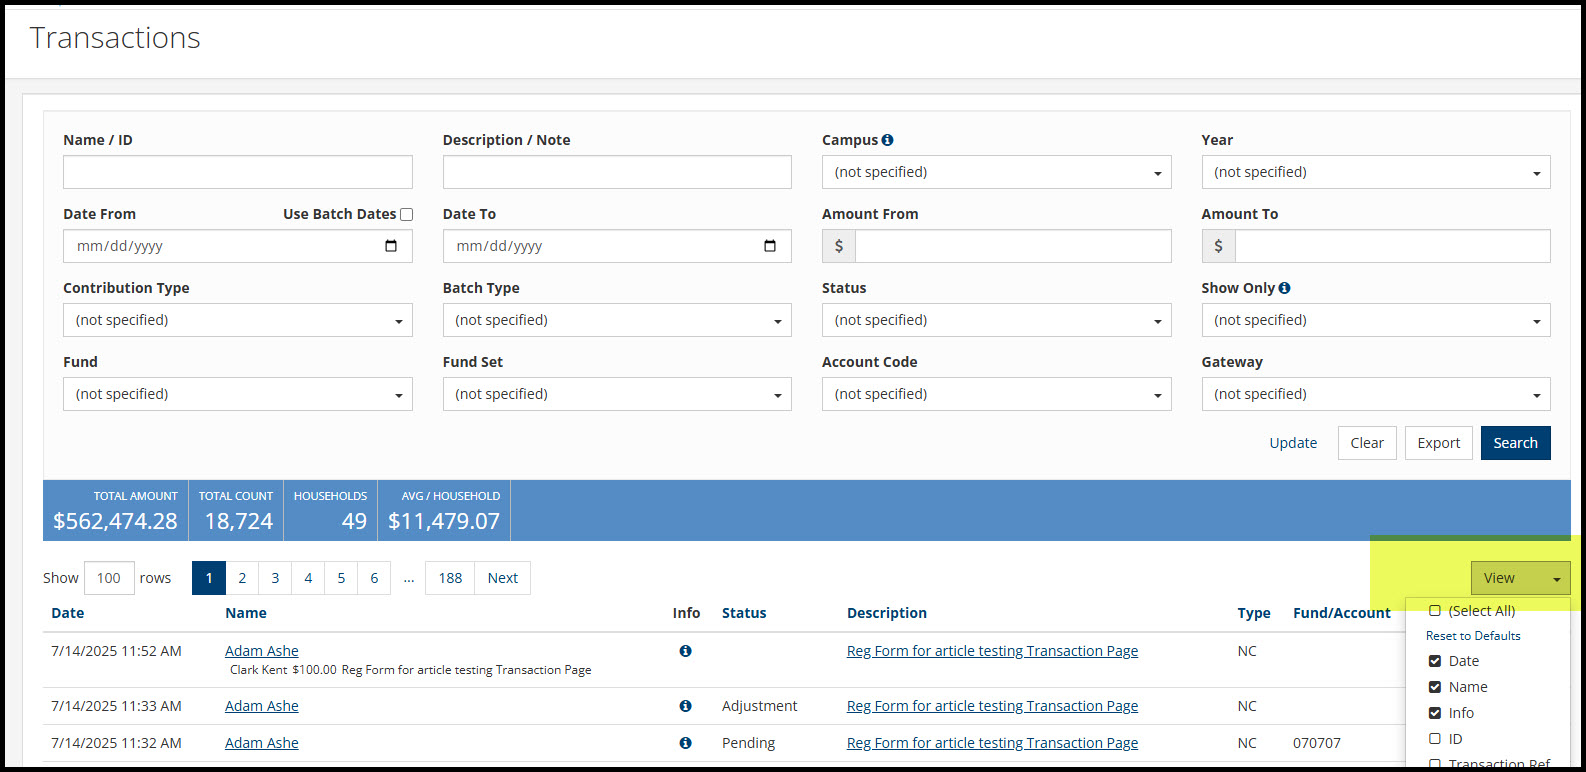
The options not included by default are:
ID - Will list the TouchPoint internal transaction ID number.
Transaction Ref - Will provide the gateway transaction ID if there was an approved payment made. This column will also indicate if it was an adjustment, or if a discount/coupon code was used. If the transaction had no cost, it will say No Fee.
Base Amount - Will provide the amount of the fee or deposit for the registration.
Fee - If processing fees are charged, the amount is provided here.
Amount Due - The balance due for the registration. If multiple family members are registered, this amount will apply to the entire family.
Note - If the payment was entered manually in a batch, the staff note in the batch entry will appear here.
Donor Note - If the donor enters a note when making an online contribution, the note appears here.
Batch Date - If the transaction has settled, the batch date will be in this column and will correspond to the date provided in the batch itself. If the batch date is shown, the “i” icon under the Info column will provide a link to the settled batch. The Status of the transaction will be Settled.
Batch Type - The options are populated from the way the transaction was entered. Online will be for online transactions. Otherwise the batch type comes from what was entered when the batches were created manually, such as Loose Checks and Cash, Preprinted Envelopes, etc.
Check Number - If a check was scanned or manually entered and the check number is populated, the number will appear here.
Check Image - If checks were scanned into a batch, a link to open the check image will appear.
Note
If all of the above options are enabled, you will need to use the scroll bar at the bottom of the screen to see all the columns, so we recommend only enabling the fields needed. Also, the view is per user, so what columns you choose to view won’t affect what someone else sees.
Filtering the Transactions
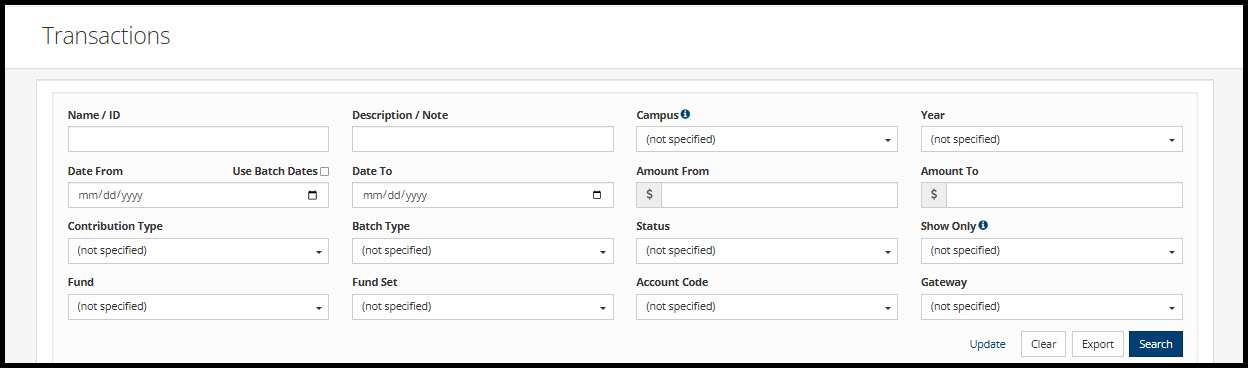
There are many options to filter the Transactions page.
Name/ID - Enter the person’s name or their People ID to filter for transactions done by that person.
Description/Note - Enter the description (involvement name or partial name)
Campus - If applicable, filter by one campus, multiple campuses or all campuses.
Year - Choose one year, multiple years, or all years.
Date From and Date To - Enter the date range to narrow the results. Otherwise transactions from all dates will be included. To only view transactions that have settled at the gateway, check the box Use Batch Dates. Note that batch dates will closely, but not exactly, align with the payment dates.
Amount From and Amount To - Enter an amount range if needed. Useful for looking for high level donors or for a specific amount.
Contribution Type - Choose one or more of Tax Deductible, Non Tax Deductible, Gift in Kind, Stock, Non Contribution, and Soft Credit.
Batch Type - Choose one or more Batch Types. TouchPoint provides some of these by default, but you can add more options through Lookup Codes.
Status - Choose one or more statuses from Pending, Settled, Refund, Reverse, Void, Adjustment, Discount Code, Failed, No Fee and Offline. Offline transactions are those that were entered manually. Also applies to coupon/discount code transactions.
Show Only - Note: Transactions must meet ALL of the options chosen. Choices are Active Tag, Amount Due, Custom Note, Fee Covered, Mobile, Recurring, and Test Transaction.
Fund - Choose one or more funds to report on.
Fund Set - If set up, choose one or more Fund Sets.
Account Code - Choose one or more Account Codes. Additional options can be added in Lookup Codes.
Gateway - If applicable, choose the gateway if using more than one.
Bulk Update
Click on the Update link to the left of the Clear and Export buttons to bulk update filtered transactions and contributions. You can update the contributor by entering the People ID, or change the fund for a set of contributions by entering the Fund ID. Then click Submit.
Export
To export an Excel report, filter per above, then click the Export button next to the Search button. The Export provides the same columns in the same order, regardless of what you’re viewing on screen.
Latest Update |
06/12/2026 |
Added ACH settlement note for refunds