App Features
Feed (Home Screen) Items
After logging into the app, the user will be taken to their personalized feed page where they will see a variety of feed items.

- Alerts
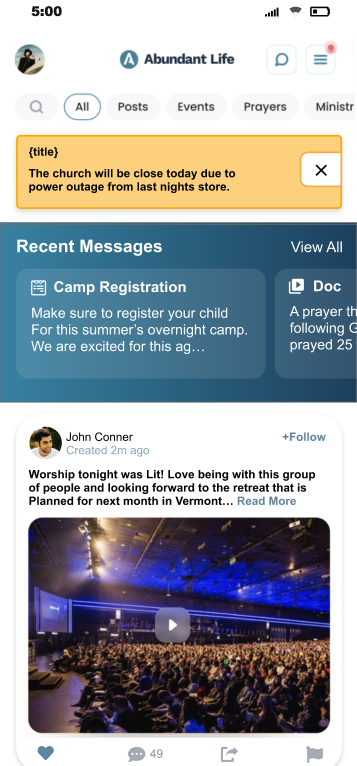
Alerts can be created for different purposes, for example, a cancellation or power outage, and any alert you feel needs to be made during a crucial moment.
Alerts will populate boxed in yellow at the top of the feed which will stand out and be visible first.
- Messages
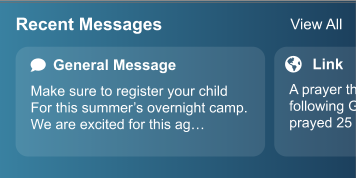
Messages will populate in the feed with text including a title and description.
You have the option to view them individually or view them all on a list view by swiping left and selecting notifications.
- Channel Posts

See the posts made by leaders of the channels you follow.
You can also choose to Like, Comment, Unfollow or Report a post.
- Personal Posts
Coming Soon
- People to Follow
Coming Soon
- Questions
Coming Soon
- Banners
Banners are created in your database under Admin > Communication > Mobile App > Banners. You create a new Banner by clicking the green + Banner button. Once they are created, you can Edit or Delete them through the icons on the right.
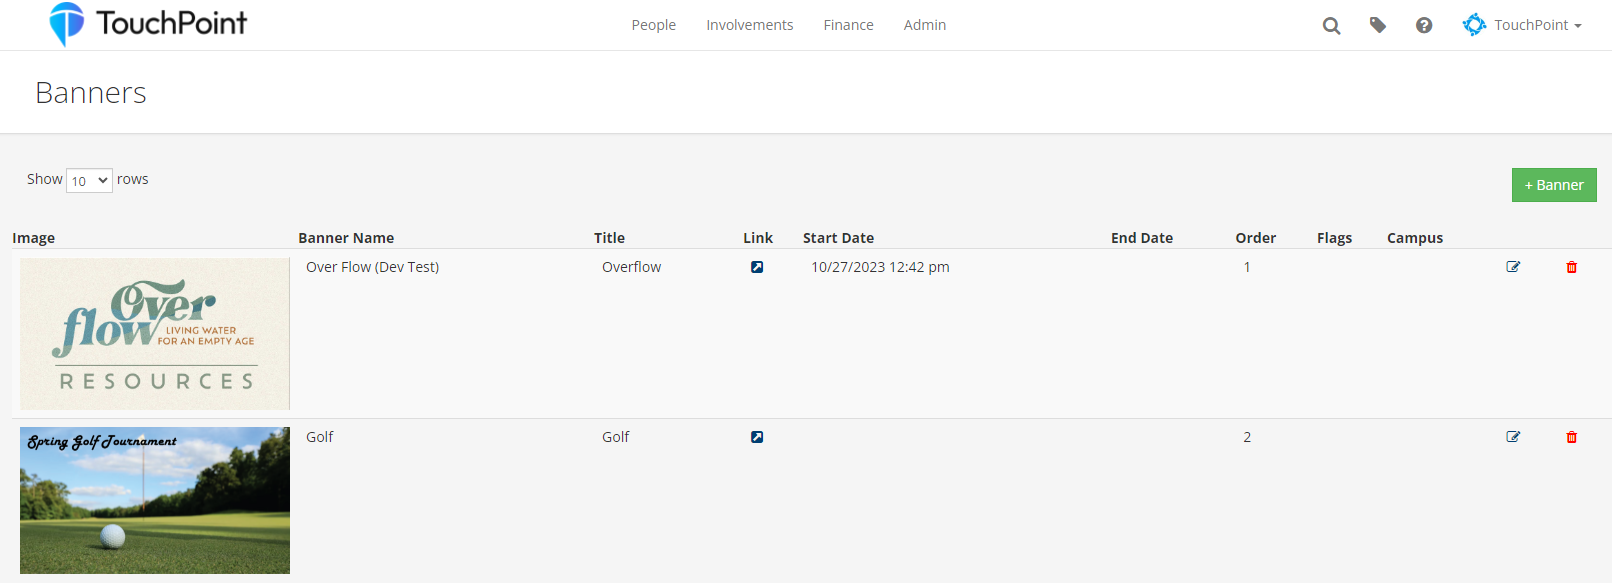
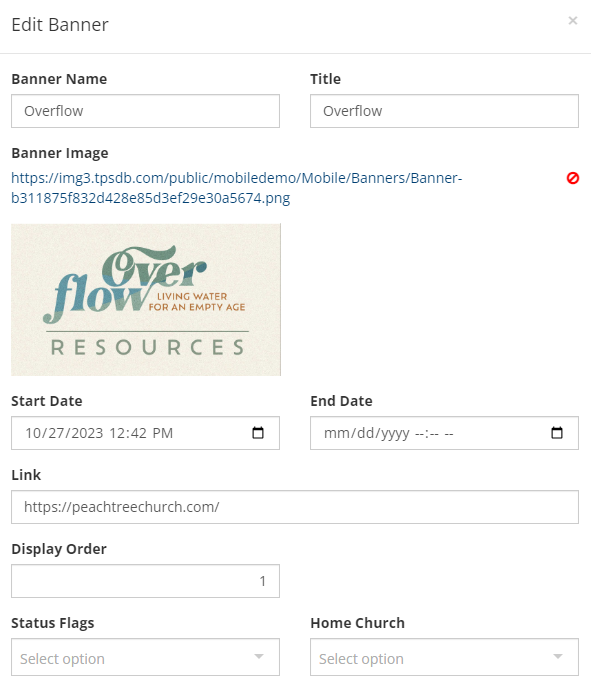
When creating Banners, there are various options that you can choose to use to make the banners function best for their desired purpose.
Banner Name - Name the banner
Title - The title of the page that the link is directed to
Banner Image - Add a banner image
Start Date - Start date to begin showing banner in app
End Date - End date to stop showing banner in app
Link - Direct banner to a specific url
Note
If your link includes your TouchPoint database or custom URL (e.g. database.tpsdb.com, my.database.com), the link will automatically be authenticated.
Display Order - Choose the order you want your banners to show in the app
Status Flags - Restrict banner visibility to a status flag
Home Church - Restrict banner visibility to a campus
- Widgets
Events
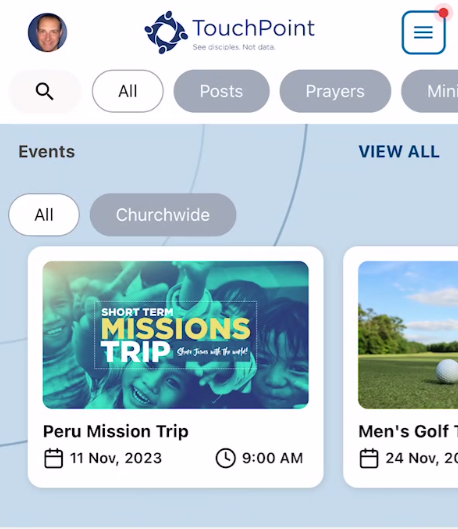
Here you can view all the events that are available to sign up for, filter the listing by category and click on a listing to view more details.
Channels
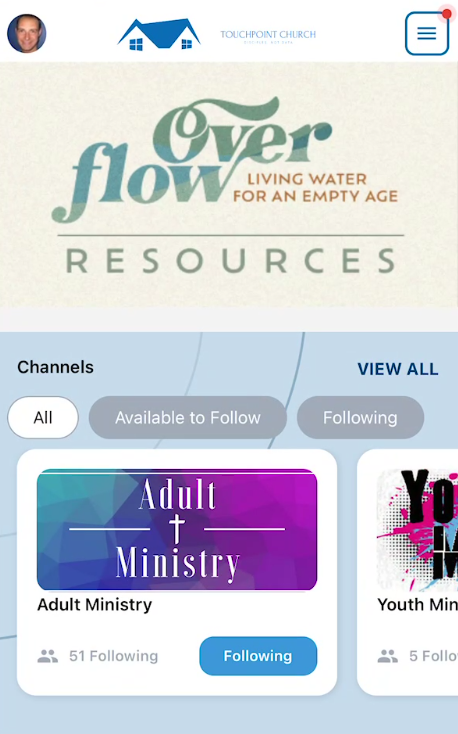
See a list of channels you can choose to follow.
When you choose to follow the channel, you can view the posts from that channel and depending on the setting you can see the leaders and followers of the channel.
Prayers
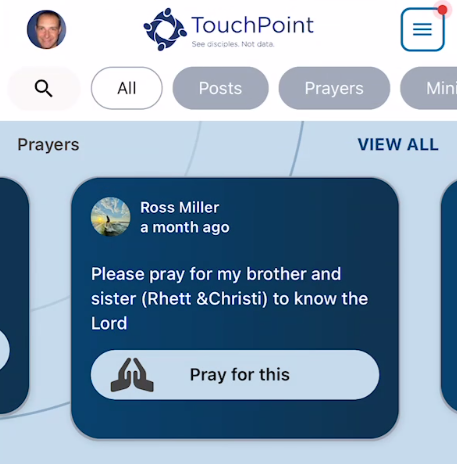
View the prayers that have been created on your feed.
Pray by pressing and holding down the Pray for this button.
Profile
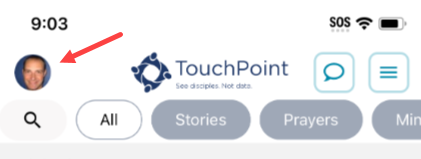
After logging in, you are taken to the feed page where you can access your profile page through the icon in the upper left corner.
- Profile
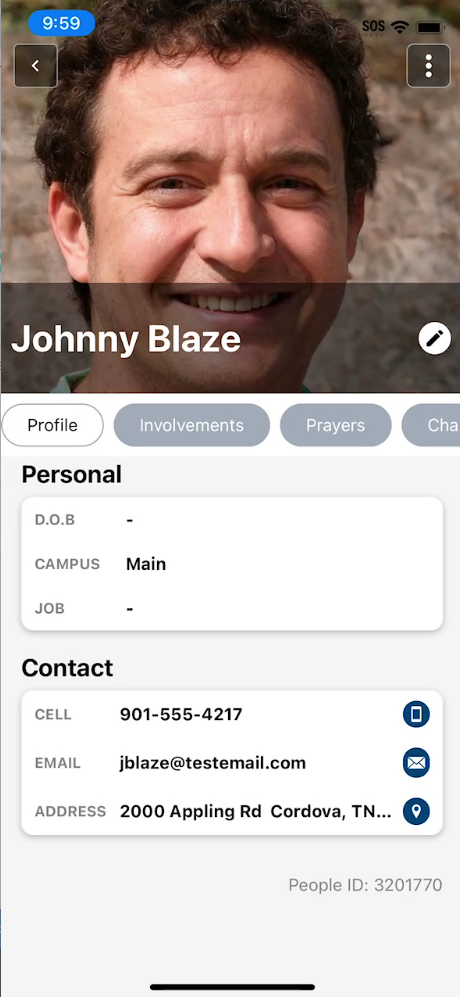
This is where a user can view and update their photo, personal information and contact information, including address. They can also view their family members and related families.
This view is the same view used in the directories, however what a person is able to see about other people will be limited by the directory settings and/or a person’s privacy settings.
- Involvements
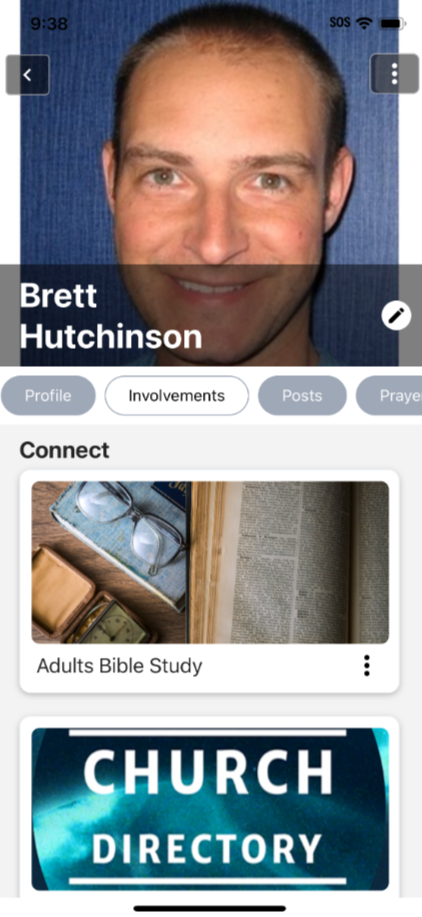
This is where a user will see all the active involvements in which they are currently enrolled. Any involvement types marked as not visible or if the involvement does not have an involvement type assigned to it, they will not show on this page. For more information on how to select which involvement types will Show In Mobile, please view our documentation page
The involvement photo (if present), name and list of leaders will be shown here.
Additional actions (coming in a later version) will be available here to do things like take attendance, view the classroom dashboard and more.
- Posts
Coming Soon
- Prayers
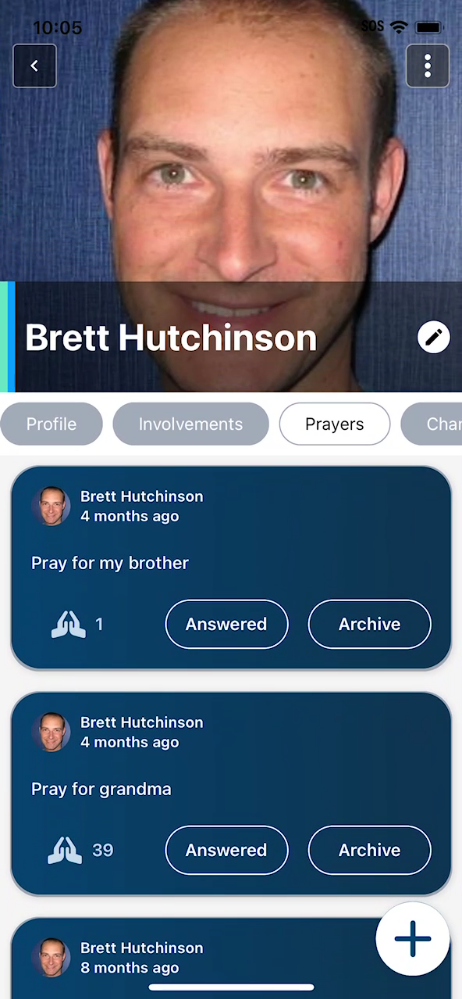
View the prayers you have made from the Prayers tab.
Choose to mark them as Answered or Archive
- Channels
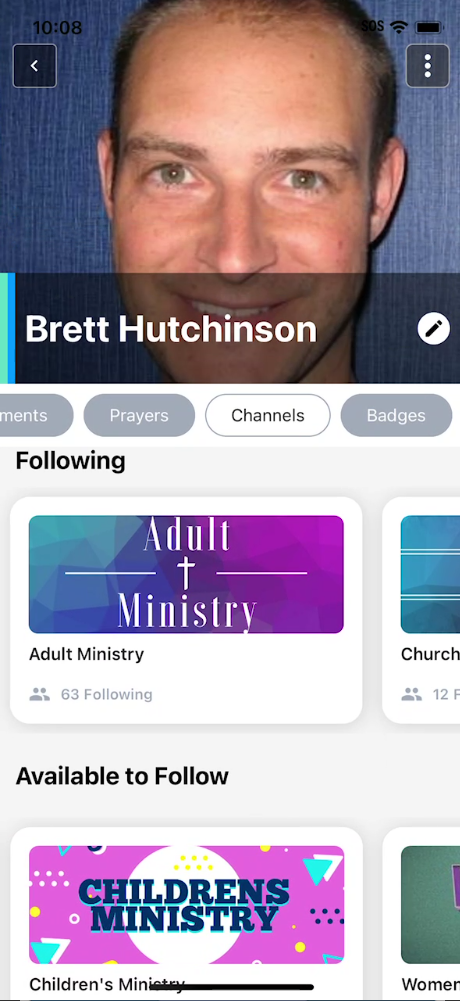
View all the Channels you follow.
You can choose to unfollow a channel at any time.
If you click on a channel, you’ll be able to see the posts from the channel, depending on the settings the leaders and followers of the channel have chosen.
If you are a leader of the channel, you’ll have an option to create a post on behalf of the channel on this page.
- People
Coming Soon
- Badges
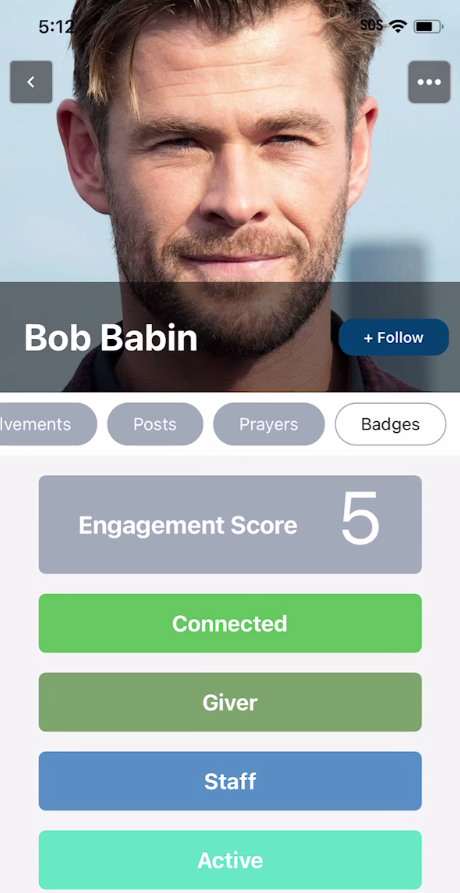
View the Badges and engagement score tied to an individual under the Badges tab. For more information on how to create Badges, please view our documentation page
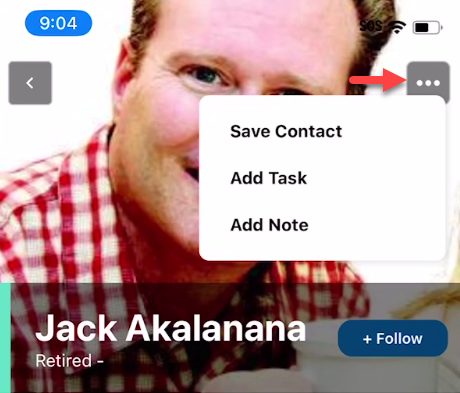
- Menu Options
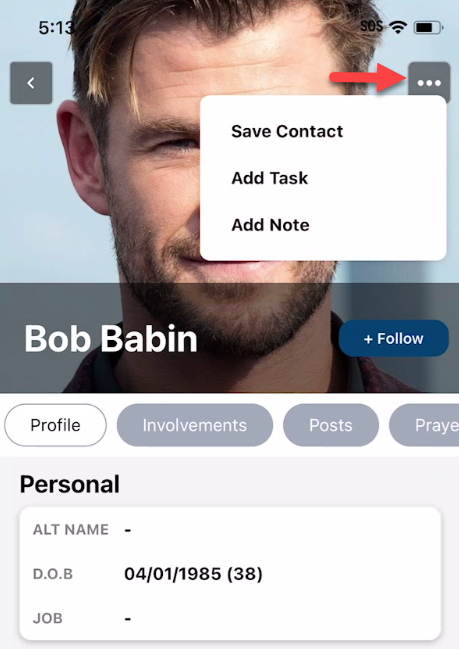
Save Contact - Downloads the person’s contact information to your device and saves it to your contacts.
Add Task - Creates a task about the person.
Add Note - Creates a note about the person.
- Edit Profile
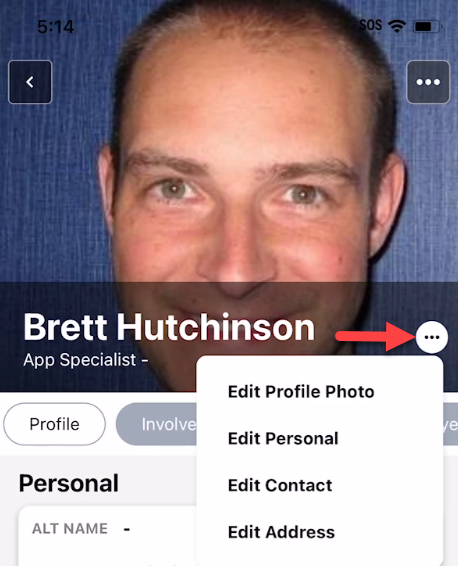
Edit Profile Photo - Add or edit the profile photo.
Edit Personal - Add or edit personal information on your user record.
Edit Contact - Add or edit contact information on your user record.
Edit Address - Add or edit your primary address.
Chat
Coming Soon
Features
- Attendance
Enable Attendance
Turning on the Attendance option is done under Admin > Communication > Mobile App > Settings > Features > Involvements > Enable Attendance for Leaders
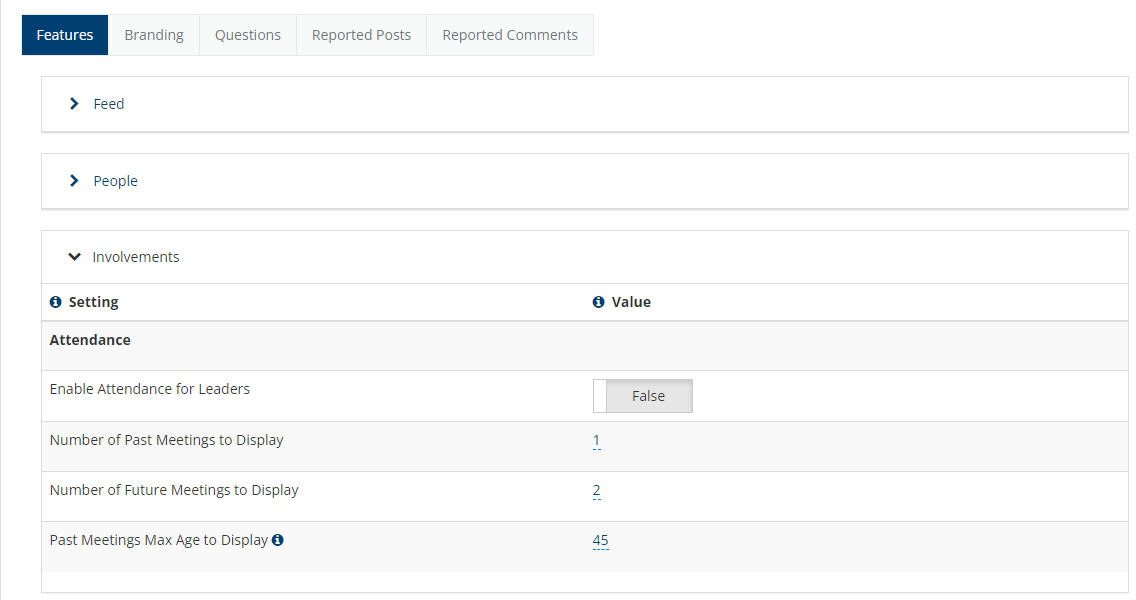
We are currently working on some additional options that you will see under that setting and we will update this information when these have been finalized and released.
Additional Setup Steps for involvement leaders to take attendance:
The Leader must have the Member Type/Attendance Type of Leader. This is found under Admin > Advanced > Lookup Codes > Involvements > Member Types
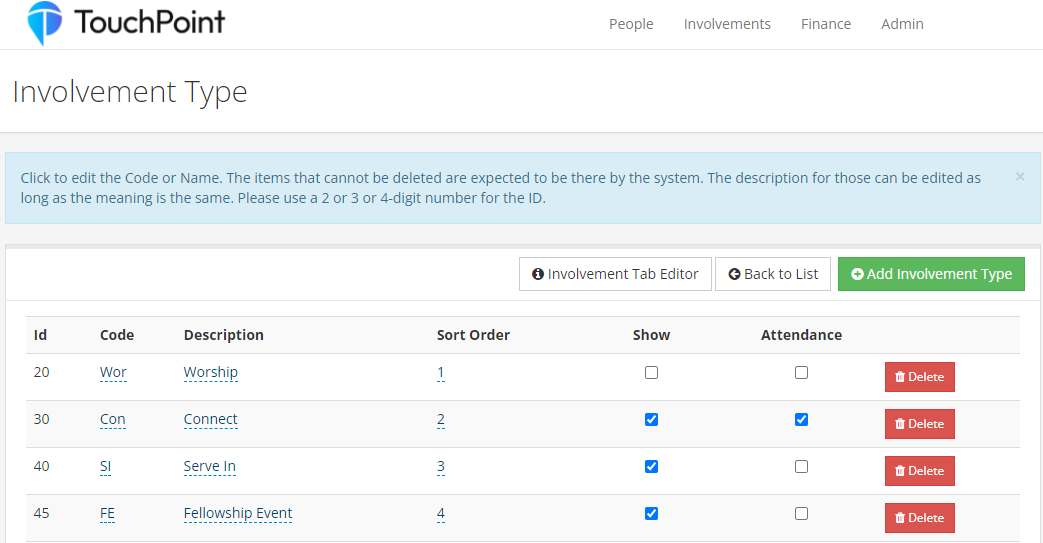
The Involvement Type must be first marked as Show in the app then to have the ability to take attendance the Attendance box must also be marked. This is found under Admin > Advanced > Lookup Codes > Involvements > Involvement Type
Taking Attendance
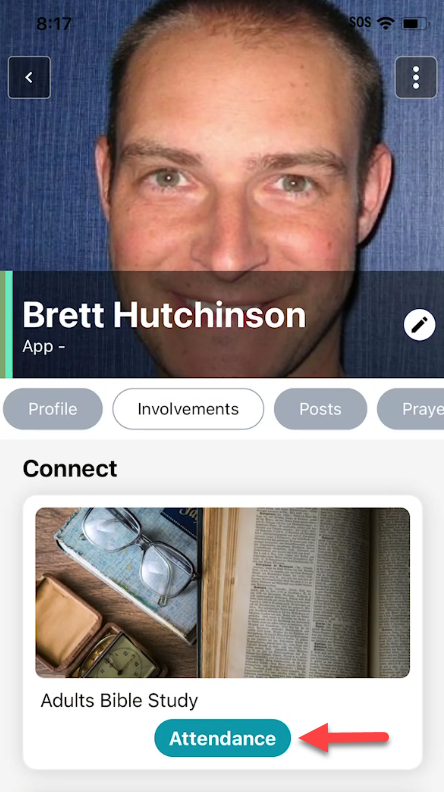
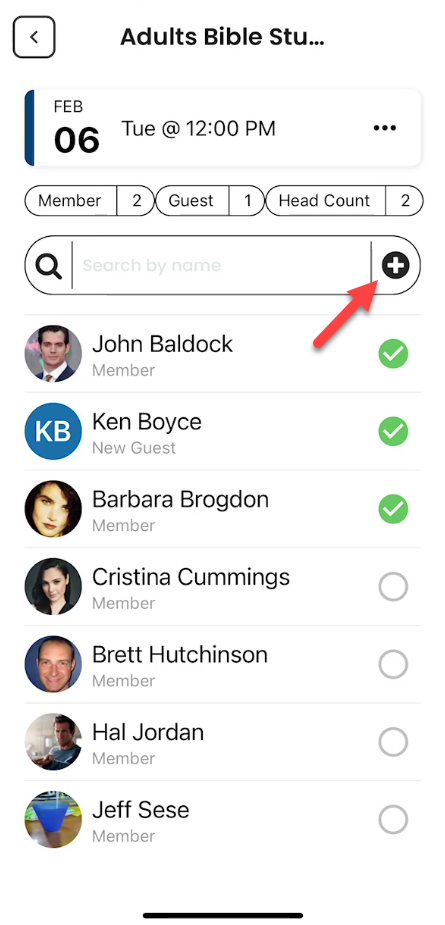
Leaders take attendance under their involvements by tapping the Attendance button.
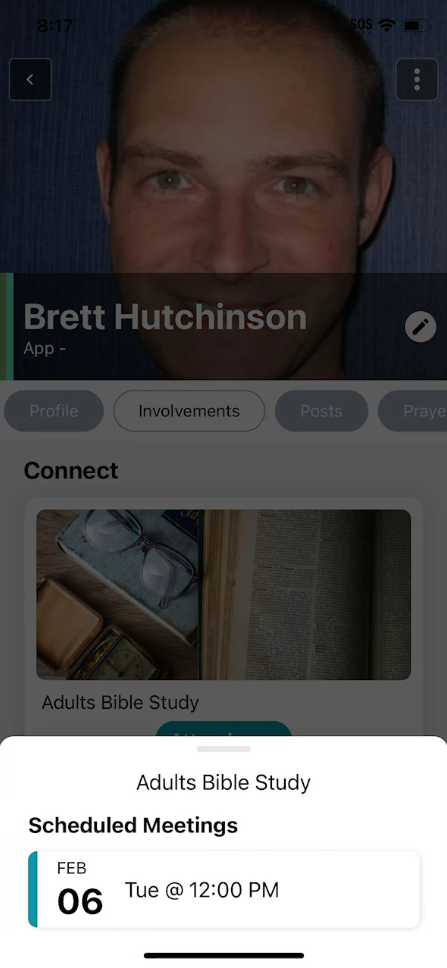
After pressing the attendance button, the available meeting dates will populate at the bottom where you can press the meeting date and take attendance for that meeting.
On the meeting page you have a variety of options:
Tapping the empty circle to the right of the individual will add a green check mark which marks them as attending.
Out to the right of the meeting, pressing the ellipsis will give you the option to Edit Head Count and update Meeting Status.
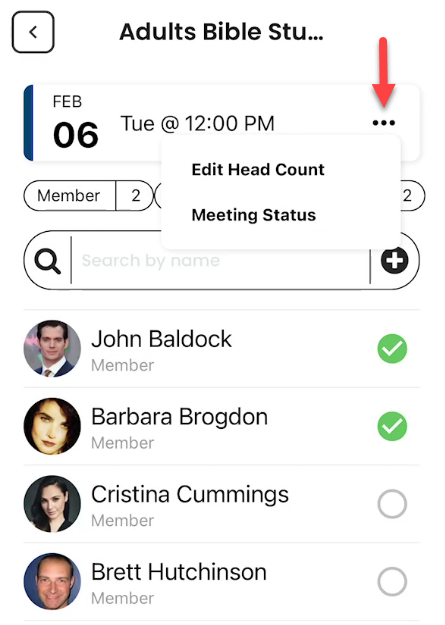
You have the ability to search the list on individuals in the meeting by using the search bar. Pressing the + out to the right of the search bar will open a new menu.
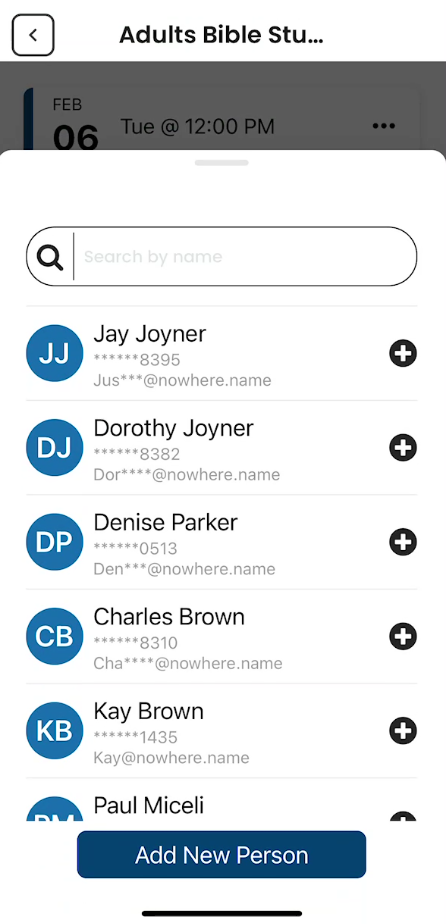
After pressing the + you are taken to the new page with the following options:
Search the list of names.
Press the + to add the individual as a guest to the meeting.
Press the Add New Person button to add any individuals that do not have a record and will be added as a guest.
- Tasks & Notes
Creating Tasks and Notes
Staff have the abililty to create Tasks and Notes easily through the app. This is done by using the Directory Search and then accessing the individual’s profile page. From the profile page in the upper right corner you click the horizontal dots icon to create a Task or Note about the individual.
After selecting Add Task or Add Note the options screen will show at the bottom where you can create the Task or Note. The options will be identical to what is available on the web.
Task Details
Keywords
Assignee
Due Date
Limit Access Role
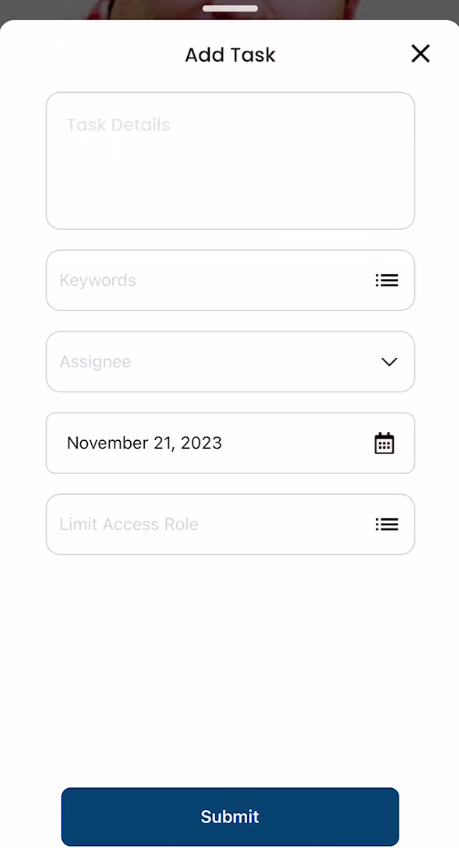
Note
When entering a Task or Note, you can use the Dictation feature on your device to add the text to the Task and Notes Details section.
Viewing Tasks and Notes
Staff have the ability to view individual’s completed Tasks and Notes through their profile. This is done by using the Directory Search and then accessing the individual’s profile page. Next, select the Touchpoints tab to see their Tasks and Notes. Pressing the creator’s name on the Task or Note will take you to their profile page.

Managing Open Tasks
Staff have the ability to manage their open Tasks from their profile. This is done by swiping left in the app where the My Tasks option is found in the Menu options.
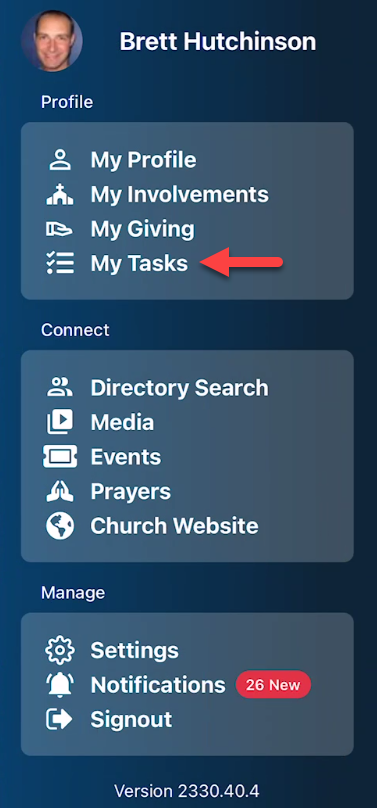
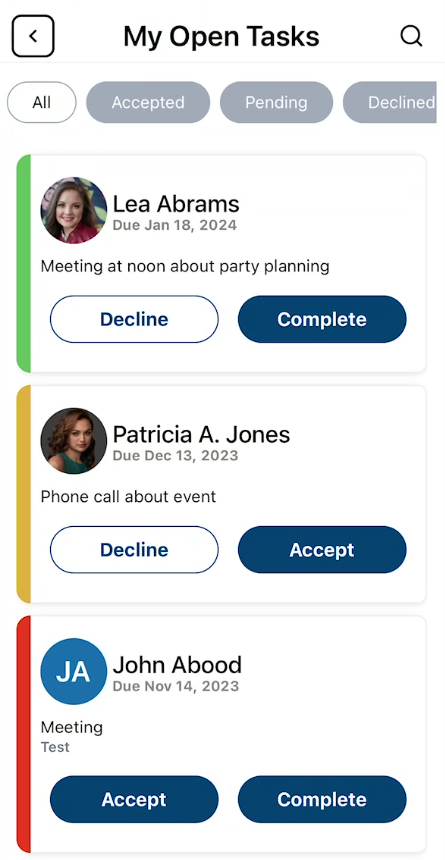
This will take the user to their open tasks page where they are organized by status and can decide which steps to take. There are actions depending on the status of the tasks which are selected by tapping the 3 horizontal dots out to the right of the task.
All - All open tasks you can choose to Accept, Complete, or Decline
Accepted - Accepted tasks which have green highlight for user to Complete or Decline
Pending - Pending tasks which have a orange highlight for user to Accept or Decline
Declined - Declined tasks which had red highlight for user to Complete or Accept
- Prayer
Directs users to a feed of prayer requests where they can view prayers that have been submitted and encourage fellow congregants by marking requests as having been prayed for.
- Events
View and register for the current Event Registrations that are available
- Giving
Directs users to their personal giving page where they can see how their gifts make an impact, access their giving history & statements or make a gift.
Note
The Giving menu item respects your church’s role design. For example, a user with FundManager and FinanceViewOnly together should see Giving when those roles are used for fund-scoped access to online giving. See Finance Roles.
- Media
Directs the user to the media page where they can see all public content as well as specific resources that might be available to them based on their involvement or interests.
- Directories
View your directories where you are a member and search for any individuals that are in those specific directories or in all of your directories.
- Deeplinking
Deeplink to download app using church’s main URL
https://{churchname}.tpsdb.com/app
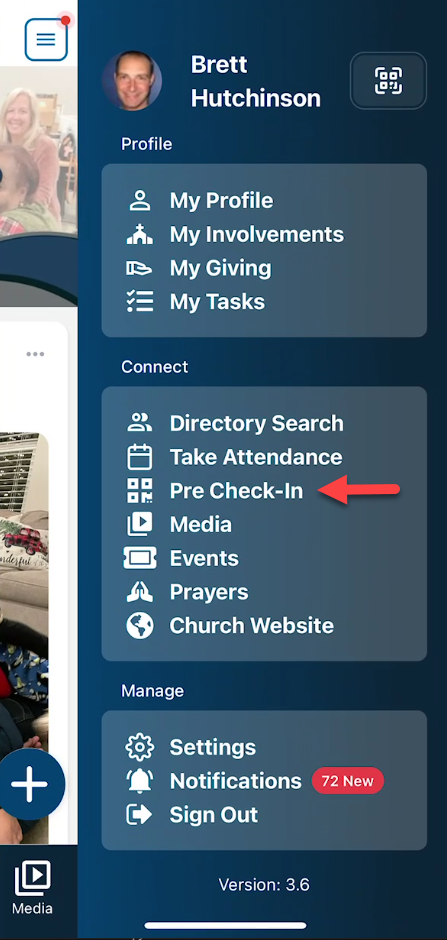
- Pre Check-In
To enable Pre Check-in, the AppAdmin must turn on this setting which is found under Admin > Communication > Mobile App > Settings > Features > Involvements > Enable Pre Check-In. Once enabled, users will see this option in the main menu under Connect > Pre Check-In where this will pull up their family where they can select the current meeting times that are available. Once they select there meetings and press Save, this will pull up a QR code which they can scan when they arrive at the church check-in kiosk to take the attendance for the individual/family.
Menu
The menu can be accessed by swiping left or on the feed page on the hamburger icon in the upper right corner. Most of the options listed above are available in the menu.
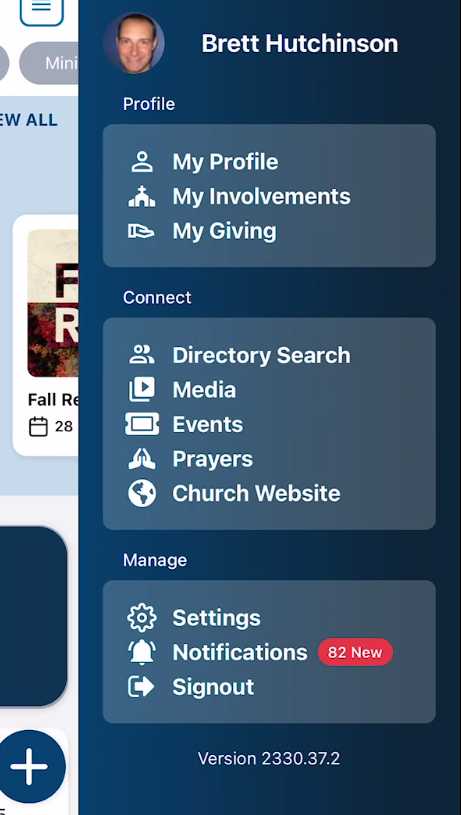
Here are some additional options available.
Settings
Manage your Push Notification Preferences
Reset PIN - Reset the PIN used to login to the app
Privacy Settings - Manage your Privacy Settings used for directories
Language - Set you language as English, Portuguese, or Spanish
Request Account Deletion - Notify the church that you’d like your record removed.
Privacy Policy - View the privacy policy
Use Google Maps - Toggle to Use Google Maps instead of Apple Maps
Notifications - View all messages and notifications sent to the mobile app
Sign Out - Use to completely logout of the app
Giving menu note for FundManager and FinanceViewOnly.