
Capturing Connect Cards
Capturing is how connect cards get into TouchPoint. You can upload a stack of cards from your desk on the Capture tab, or hand a phone or tablet to a volunteer and let them photograph cards one at a time with Quick Capture. Either way, each card is read by TouchPoint and added to the Capture Queue to be reviewed.
Before you start, make sure you have a card template for the card you are capturing.
The Capture Tab
Go to People > Connect Card. The page opens on the Capture tab.
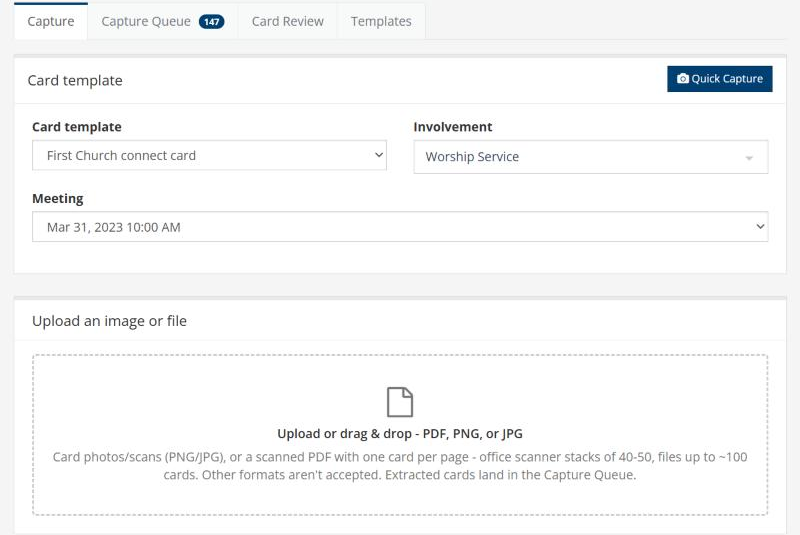
The Capture tab, with a template, involvement, and meeting selected
Choose the Card template that matches the cards.
Optionally, search for and select the Involvement the cards were collected for — for example, your Sunday worship service or a guest event. Type any part of the involvement’s name to search.
Once an involvement is selected, a Meeting drop-down appears listing that involvement’s most recent meetings. Optionally, choose the meeting the cards were collected at.
Drag the files onto the Upload or drag & drop area, or click it to browse for them. You can add several files at once.
TouchPoint prepares the files, uploads them, and reads each card, showing its progress as it goes. When it finishes, it reports how many cards were added to the Capture Queue.
Accepted files
Photos or scans of individual cards in PNG or JPG format.
A scanned PDF with one card per page — for example, a stack of cards run through an office scanner. Each page becomes its own card. A PDF can hold up to 100 pages.
Other file types are not accepted.
Why choose an involvement and meeting?
The involvement and meeting stay attached to each card. When the card is imported, TouchPoint uses them to:
set a new person’s Entry Point to the involvement’s Entry Point,
add the person to the involvement as a Visitor, if they are not already a member, and
mark the person present at the selected meeting.
You can also filter the Capture Queue by involvement, which helps when cards from several services or events are being worked at the same time.
Note
If TouchPoint cannot read a card, the card is still added to the Capture Queue with a status of Failed. You do not need to upload it again — open the queue and resubmit the card. See The Connect Card Capture Queue.
Quick Capture
Quick Capture is a simplified, upload-only page designed for a phone or tablet. A volunteer at a welcome desk can photograph cards as they come in without seeing the rest of Connect Card.
To open it, click Quick Capture in the Card template box on the Capture tab.
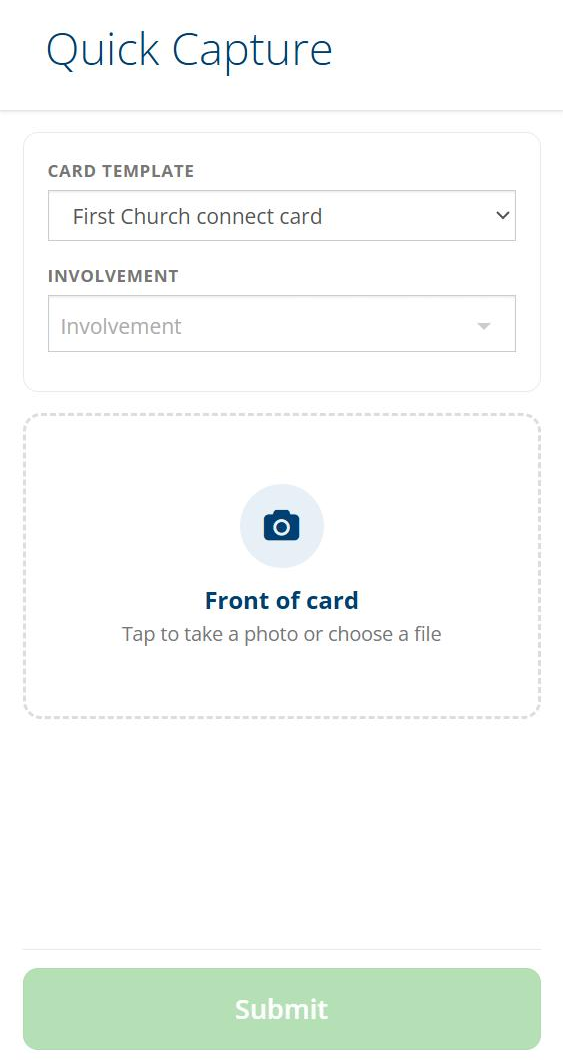
Quick Capture on a phone
Choose the Card template, and optionally choose the Involvement and Meeting.
Tap Front of card to take a photo with the device’s camera or choose an image file. If the photo is not clear, tap Retake.
Tap Submit. When the card has been sent, a Card submitted message appears. Tap OK to capture the next card — the template, involvement, and meeting stay selected.
Quick Capture accepts photos only; to upload a PDF, use the Capture tab.
Opening Quick Capture for a specific meeting or involvement
You can open Quick Capture with the involvement or meeting already chosen by adding it to the page’s web address — useful for a bookmark on a welcome desk tablet or a QR code for a particular service:
https://yourchurch.tpsdb.com/ConnectCards/QuickCapture?meetingId=12345selects that meeting and its involvement.https://yourchurch.tpsdb.com/ConnectCards/QuickCapture?involvementId=678selects that involvement and leaves the meeting for the volunteer to choose.
Replace yourchurch with your church’s TouchPoint subdomain, and the number with the ID of the
meeting or involvement. If the meeting or involvement cannot be found — for example, because it was
deleted — Quick Capture shows a message saying it was unable to open the meeting or involvement,
but still opens so the volunteer can choose it themselves.
Tip
The person using Quick Capture must be signed in to TouchPoint with a user that has the Access role.
Latest Update |
10/07/2026 |
Created article for the new Connect Card feature.