Involvement - Defined and Dissected
- Involvement
An Involvement is one of the most heavy-duty, versatile components of TouchPoint.
It is more than just a class, a roster, a group, event or a list. An Involvement is not the people. It is the container, so to speak. An Involvement can contain people. Those people connected to an Involvement can be any of the following:
- Members- Guests- Previous Members- Inactive Members- Pending Members- Prospects
Please view Chapter 1 - Overview - for a 7 minute explanation of Involvement Basics, and the entire video (28 minutes total) for a full visual companion to this article.
Involvements are used to help you minister to people. Lay leaders can have the OrgLeadersOnly user role and access people connected to the Involvement / class they lead.
An Involvement without members contains attendance for meetings (a Headcount) and guests for meetings (Worship Service, Special Event). In this case, the Involvement is tracking unknown people (using a headcount) as well as known people (guests, using individual attendance for them).
An Involvement can also be a means of identifying people:
Those who have met certain qualifications (Crown Certified, Approved Counselors),
A mailing list (random people who want to receive communications…like fellow-pastors),
A means of grouping together those with certain common attributes (all those who are home-bound, all who use Facebook).
Involvement Details
At the top of the Involvement page is the section for the details relating to that Involvement. That includes the Name, Involvement Type, Campus, Leader Member Type, Schedule / Meeting Series, Involvement Status, and Main Fellowship flag.
You can click the appropriate pencil icon to make any changes to these.
Note
Each Involvement has a unique ID that is automatically assigned by TouchPoint. This ID can be found at the end of the URL when you are viewing the Involvement.
Example: https://church.tpsdb.com/Org/123
- Programs & Divisions
You can edit the Involvement’s Program & Division on the Involvement itself by clicking the existing Program & Division on the Information Icon (i) in the header.
See also
People Tabs
Under the main People tab are the following tabs:
Members - Those currently enrolled in the Involvement. We display the person’s Last Attended Date (with the number of days since he attended), the Join Date (with the number of days since he joined), and the person’s attendance percentage in that Involvement (this looks back 52 meetings, or since the person was enrolled).
See also
Attendance String for more about attendance within an Involvement
Previous - Members who have been dropped from the Involvement. The person’s Last Attended Date (with the number of days since he attended) and the Drop Date (with the number of days since he was dropped) will display by his name.
Inactive - Members who, for whatever reason, are not considered active. We created this for deacons who serve a 2 or 3-year term and then go inactive for year before returning as active.
Pending - This is used during Annual Promotion to place members in a class in a pending state prior to the actual promotion date.
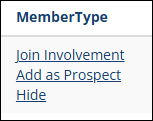
Prospects - People who have been associated with the Involvement, even though they may not have attended yet.
Guests - People who have attended a meeting, but are not current members. Guests may or may not be on the Prospects tab. The person’s Last Attended Date (with the number of days since he attended) will also display by the name.
Options - Select options to view multiple tabs, show the street addresses, show ministry info, and show hidden records.
Options
The Options tab has the following action options that relate to how the people are displayed and what information is display.
Select Multiple
Show Hidden
Note
The Options tab label will change to display whatever option(s) you have selected).
- Select Multiple
Select this option and then select any of the other tabs whose list of people you want to view in one list. You will see each list incorporated under the Members Tab and can run reports or send emails or texts with the group of people you are viewing. Example: Click Options > Select Multiple > then Members and Guests tabs. You will see a list of all the Members and all the Guests (that are not hidden) in one list.
- Show Hidden
Select this option to view any Prospects and/or Guests that have been hidden from view. See below for more information.
Other Involvement Tabs
- Meetings
The Meetings tab displays a list of all the meetings for this Involvement, with links to those Meetings. This is also where you Create a New Meeting, and can Show Future Meetings.
- Notes
The Notes tab displays a list of Involvement notes and allows those with the appropriate roles to add new Involvement notes.
Note
There are a a few Administrative Settings to pay attention to that will affect the use and visbility of the Notes tab in an Involvement. All of those settings can be find by navigating to Adminstration > Settings > Features > Tasks & Notes.
Use Involvement Notes - When set to True, the Notes tab will be available in Involvements.
Involvement Types for Notes - This will limit the Notes tab to only those Involvement types listed as comma separate values.
Involvement Notes Roles - This will limit the Notes tab to only this with the roles listed as comma separated values.
Important
There are several rules that govern who can delete an Involvement note:
You can delete an Involvement note if you are the Owner/Creator and it is within 24 hours of completion/creation.
You can delete an Involvement note if you have the Admin role.
See also
- Settings
Under the Settings tab are the following tabs:
General - These are settings such as Location, Grade, Description, Entry Point, and Directory settings.
Attendance - This is where you add Schedules / Meeting Series.
Extra Values - Extra Values for the Involvement display here. Use a toggle to change from Standard to Ad Hoc. You can add EVs here as well.
- Registration
This contains the settings for online registrations. If you have the Registration Type set to anything other than No Online Registration, you will see the following other tabs that relate purely to online registrations:
Registration - This is where you set basic information for your online registration.
Fees - This is where you see the Deposit, Fees, GL Code, and more items relating to payment for an online registration.
Questions - This tab is where you select all the drop-downs, check boxes, yes/no questions, and more for your registration form.
Messages - This tab is where you compose the email confirmation, any instructions, and more relating to your registration.
See also
Blue Toolbar
There are a number of options available on the Toolbar, including Email, Exports, Reports, and Actions.
See also
Filters
- Name Filter
This is a quick way to find an individual in an Involvement when the list is long. Enter first and last name, just the first name, just the last name, or enter just the first few letters of each name. You can also enter a People ID#. The name filter works on any of the tabs you are viewing. Press Enter or the Filter button after entering the name.
- Sub-Group Filter
Select a sub-group from the drop down, or enter the name. Use a semi-colon to separate multiple groups. If you select them from the drop down the semi-colon is added automatically. To exclude a sub-group, lead with a minus sign. If you have several groups that begin with the same first few letters and you want all of those groups, enter those letters followed by an asterisk.
To find those with no sub-groups assigned you can select
NONEfrom the drop down.To find people who are in each of the groups specified select
ALLfrom the drop down.Press the Filter button after identifying the sub-groups.
Tip
In various places on the Involvement page and throughout TouchPoint, you will see the icon of a small i inside a blue circle. Click that to view help information about that item.
- Clear
Press the clear button when you have finished with the filtered list. The Filter button will display
(filtered)in red when you are viewing a filtered list.- Filter
The button has several options related to the check boxes beside the names. After you check some names, select Filter Checked Individuals or just press Filter. You can also select
Check Allto select everyone on the tab you are viewing. When you want to remove the check marks selectCheck None.- Check Boxes
The names on every tab have a check box beside them. You can use these on one tab or you can use Options > Select Multiple, click on the tabs you want to view Members and Guests, or Members, Guests, and Prospects, or whatever combination your want. You can then check the names of those you want to email, print a report for, add to a Tag, or whatever you need for that group of people. Be sure to press the Filter button after checking the names.
Note
You can actually go to each tab individually, click the names of people you want, and then select Options > Show Multiple, select the tabs where you have checked individuals, and then press Filter. You will then see one list of everyone that you checked.
- Total Count
Pay attention to how this number changes based on whatever filter you are using. This will be the number of people you will email, or update, or add to a tag, or whatever you select to do.
Latest Update |
10/16/2025 |
Updated People Options and Add as Prospect Image