Toolbar Options
The Blue Toolbar is where most reporting, managing or communicating with people is accomplished. This toolbar has 4 icons seen in the image below. We describe them as Email, Cloud, Code, and Gear icons. Under each of the icons are groupings of links to help you find just the report or action you need.

The Blue Toolbar
The Blue Toolbar is found in the top right corner on each of the following pages.
|
|
Important
The specific menu items are customized for the purposes of each page. On the first four pages listed, the reports, exports and actions apply to the specific filtered list of people appearing on that page. The Count indicator above the people list is an accurate indicator of the number of people that will be included in report or action.
Sometimes the menu items will apply to the page in general. On the Involvement page, this difference between the action applying to the filtered list vs page in general can be mixed and the links are color coded with green for the entire page vs gray for the filtered list.
The table below shows the general purpose for each of the four icons.
Icon |
Purpose |
||
|---|---|---|---|
Envelope |
|||
Cloud |
for exports, reports, labels and more A cloud icon is used because you are downloading exports and reports from our servers in the cloud (Internet). |
||
Code |
|||
Gear |
Tip
The pattern for producing any report or action from the Blue Toolbar is a two-step process:
Find or select the people you want to work with
Use the Blue Toolbar to
communicate with,
report on,
or do some other action on those people.
Email and Texting (envelope icon)
- Individuals
This sends an email to each person in your list/search and is addressed as though it were an email just to that individual. In other words, there is no need for blind carbon copies.
See also
Note
If emailing from an Involvement for which people registered online, TouchPoint will use both the email address on the person’s record as well as the email address that was used during the online registration, if they are different. If you get returned email, be sure to change the email address in both places (or remove the registration email). You can access this registration email by going to the Member Dialog for that person within the Involvement.
- Current Members
Select this option if you want to schedule an email to be sent at a future date, and you want to ensure that, at the time the email is actually sent, the recipients are current members of the Involvement.
See also
Note
This option is only available on the toolbar when you are emailing from an Involvement, not from Search Builder or a Tag.
- Parents
This sends an email to each Primary Adult in the families represented in your list. Because many families use the same email address, you will probably want to use the email replace code {first} in the greeting. This will address each parent by name so they see that they are receiving the email to each parent, not that they are receiving it too many times.
See also
- Child with Parents CC’d
This will copy both Primary Adults in the family in addition to sending the email to the child. The replacement codes used in the email, will come from the child’s record, not the parents.
This option works even if the child does not have an email address. As long as any of the three possible people (child, mother, or father) has an email address, the email will be sent.
Tip
Because the parents will receive a copy, you may want your greeting to be something like
Hi {first} and parents- Single Email Addresses
This will send only one email per email address, even if multiple people in your recipient list have the same email address.
Warning
When using Single Email Addresses option, do NOT use email replacement codes - not even {track} - as these are dependent on email being sent to an individual, not merely to an address. Also do NOT use special links which are authenticated to a person, not an email address.
This single email type of option is designed for use when sending out general information that is not specific to one individual.
Example: Your search is for children enrolled in any of several Involvements and there are multiple children with the same email address (probably a parent’s). Only one email will be sent to that address. So, you obviously would not want to include, for example, a name or class assignment type of replacement code.
- Create / Edit Saved Draft
Use this option to create a new draft or access saved drafts for editing.
See also
- Send Text
This option displays only if you have your database set up to use Twilio for sending texts.
See also
Exports and Reports (cloud icon)
This section has lots of Excel Exports and PDF reports. In fact, most of your reporting on people will happen here.
Export Excel
- Standard
This is great for Word merge and contains a lot of information, with the address all in one field.
This export uses the Choose Format Dialog.
- Mailing / Bulk (csv)
This is designed for bulk mailings and has only name, address info, in addition to the People ID # of the person or Head of Household if a family list. The address is in 5 separate fields: Street Address 1, Street Address 2, City, State, and Zip. This also works great for mailed envelope sets, as you can upload this file to the envelope service vendor. You have the same options for the output as indicated above for the Excel export.
This export uses the Choose Format Dialog.
See also
Note
If you want to actually print labels for a bulk mailing, select Labels>Roll Labels or Avery Address`and select `Print by Zip.
- Family
This contains one row per family with the family address and lists the children in one cell (John, Mary, George).
See also
- Pictures
This can be used to create a custom directory using Word merge.
See also
- Extra Values
This export contains the People ID and Name of each individual in your selection along with a column for each Extra Value assigned to that record. In the column will be the actual value. Depending on the type of Extra Value, this will be True or False, a date, or a data.
- Status Flags
This export is a great analysis tool. It will list the individuals in your selection with their People ID#, Preferred and Last Names, Marital Status, and the date they first attended something at your church. The next columns will have headers based on the special Status Flag searches you have constructed and saved and will display an X beside the names of the individuals in your selection who fit those specific searches.
See also
Involvement Members Exports
These exports show up in the context of certain tabs when you are on the Involvement page or on the Involvement > Manage > Search page.
- Export Members
This is basically the same export as the Member Export below. However, this one can be generated from the blue Toolbar on the Involvement > Manage > Search page.
See also
- Member Export
This export has information specifically related to a person’s membership in an Involvement. Therefore, it is available only on the toolbar when you are on an Involvement.
See also
- Groups Export
This contains basically the same information as the Member Export with the addition of a column for each small group in the Involvement. If a person is in a group, there will be a 1 in their row in the column for that group.
See also
- Promotion Export
This is available on the toolbar only on an Involvement page and contains information specially related to performing Annual Promotion.
This export contains the current Location of the Involvement and Pending Location for each person listed. This is a great follow-up tool to see where each child is being promoted after you have assigned the new class, but before you have finalized Promotion. This report only applies to those churches using the Annual Promotion method. Most churches will use Manage Involvement Members for Promotion.
Other Exports
- Attendance (Main Fellowship)
This report contains phone numbers, email addresses, mailing address, birthday and an attendance string for their Main Fellowship class. This export displays the Main Fellowship attendance with Ps and dots to indicate present or absent for the past 52 meetings. It is helpful to see at a glance if a person has been attending a Main Fellowship class.
- Children
This is similar to the Main Fellowship Attendance report, but without all the Main Fellowship information It contains the Emergency Contact, Emergency Phone, and Medical information from the Involvement>Registration tab of the individual.
- Involvement
This report was designed specifically for use when you need to see a lot of information in a compact report. It opens with Excel and has columns to allow for sorting by last name, as well as for you to enter your own notes. The Main Fellowship class will be listed apart from the other Involvements/Enrollments and will indicate the name of the class, their member type within the class and their attendance percentage. We use this when evaluating deacon or committee nominees.
- Library
This can be imported into the Atrium Library system to keep the records up to date with what is in the TouchPoint database. The following fields are used: People ID#; First Name; Last Name; Address; City; State; Zip; Email; Birth Date; Home Phone; Cell Phone; Work Phone; Member Status; Marital Status.
- Other Churches
This opens in Excel and contains information relating to a person’s church member status. It has a column for their Previous Church (for Members) and New Church (for Previous Members). The Previous Church field is also populated for Non-Members when they provide us with their current church during a registration or Check-In.
- Member Info Export
This Excel export contains columns for each aspect relating to a person’s church member status - items relating to their decision, baptism, new member class, etc.
See also
- Worship Attendance
This option is only available for churches that track individual attendance in a worship service and have an Admin Setting for WorshipId.
See also
Reports
- Notes Report
This can be generated everywhere you see the Blue Toolbar. However, it is most helpful when you run a search for recent guests as it contains information about any Tasks or Notes that have been made. It was created specifically as a tool so those making follow-up phone calls or visits to guests would have a summary of what has already been done.
The Sorted by Address version of this report sorts by State, City, and then the Street Address. This is helpful when you have people living at the same address, but with different names, as they will all be grouped together.
See also
- Family Report
This report lists all the family members, the family address, the individuals’ phone numbers and email addresses in addition to their date of birth, gender, church member status, Y or N to indicate if they have marked that they attend another church (this information comes from online registrations), their position in the family and their Main Fellowship class and leader. The families are grouped together with a heavy line separating each family. Within the family itself, the person in your search or in the Involvement from which you run the report will be listed first with the other family members listed below them.
Example
If you run the report for a boys’ baseball team, each boy will be listed first in his family, then the parents, then any other children.
- Inreach/Outreach
These reports can be generated for an individual, an Involvement (both Members, Previous Members or Visitors) or from Search Builder results. These are useful when making visits or calls as they contain information about a person’s Involvement, Visits, Family, etc.
The version with the form has an extra page that is helpful for making notes immediately after (or during) a visit or call in order to capture information that should be entered into TouchPoint when you enter the Contact.
These will sort by zip +2 in order to facilitate grouping multiple forms together for making personal visits.
See also
- Weekly Attend
This report contains phone numbers, email addresses, mailing address, birthday and an attendance string. The string displays dates that the person has attended anything (the first 3 and the last 8 dates) as well as Ps and dots to indicate present or absent for the past 52 meetings. It is helpful to see at a glance if a person has been attending anything.
Involvement Members Reports
These reports only show in the context of an Involvement.
- Roll Sheet Report and Rally Roll Sheet
This allows you to print a roll sheet for an individual Involvement. The normal way to print roll sheets would be from Involvement > Manage > Search for an entire Program and/or Division and Schedule.
See also
- Roster and Extended Roster Report
This can be generated for one Involvement or from Involvement > Manage > Search and lists Members alphabetically, group by Involvement, along with their People ID#, Member Type code, and Medical/Allergy info. It is useful when placed in a classroom. The Extended Report has Contact and Church info.
See also
- Classroom Sign-in Sheet
Provides a PDF version of the class list. The Header contains the Church Name, Involvement Name, and Report Date. Also includes columns to mark the Member present, the Member’s name, the Parents’ names, Allergies, and extra lines for write-in Guests.
- Registration Report
You can generate this report anywhere you see the toolbar. However, it is most useful for Involvements such as a Camp or a Mission Trip as it has information from an online registration that you would need in an emergency. It can be printed (one page per person) and kept in a notebook for use when you don’t have access to a computer. It lists Allergies/Medical Information, Insurance information, emergency contacts, etc. It also lists any small groups within that Involvement of which a person is a part.
See also
- Submission Report
The Submission Report is used for registration reporting. It includes information about each registrant in Excel format, with one row per registrant. Each question included in the registration form will occupy a column on the spreadsheet. If Allow Re-Register is True for the Involvement or the registrant has been dropped and then re-registered, the report will contain a separate line item for each registration. The report will be sorted by most recent registration.
See also
Directories
- Compact Directory
This is directory without pictures but with family members’ names, phone numbers, email addresses. The data displays in 3 columns, with divisions for each letter of the alphabet.
See also
- Picture Directory
This is an individual picture directory (using individual photos, not family). You have the option to select the one that prints 24 people per page or one that prints 4 per page.
- Family Picture Directory
This directory uses family photos and presents 12 families per page with the names of the family members and the home phone number. It is best to run it from Search Builder so you can add the condition Is Head of Household. Otherwise, if you have more than one family member in the selection, it will print the family photo for each member of the family.
See also
Address Labels
- Address (pdf)
This is a PDF version of the Avery 5160 labels. Sometimes the PDF reader you use will have problems aligning the labels. If you have that problem, you might want to use the Word version below.
This report uses the Choose Format Dialog.
See also
- Avery Addr (word)
This is a Microsoft Word version of the Avery 5160 labels.
This report uses the Choose Format Dialog.
- Employer
This also prints to the Avery 5160 format, but adds the Employer name; making it useful for Business entities.
This report uses the Choose Format Dialog.
Use Case for Employer Labels
You are mailing to churches and you have a record for the ‘person’ (with the pastor’s name in the name fields), but with the church’s address for the preferred address and listing the church as the Employer. Obviously, you do not need these labels except when you are mailing from a tag or a group that you know has the Employer’s address for the person.
- Continuous Roll Labels
This report works with a Datamax 3 or 4 inch roll label printer.
Other Labels
- Barcode / Name
These print on Avery 5260 labels with a bar code in the first column and 2 name labels for the person in columns 2 and 3. These can be used to record attendance at 2 events.
- Name
These print on Avery 5260 with a First (Goes By, if there is one on the person’s record) and Last Name.
- Name (with Phone Number)
These print on Avery 5260 labels with one label per person with a name, people ID # and cell phone number.
See also
Choose Format Dialog
Some exports and all of the Address Labels will present a dialog box where there are Addressed To Options and Label Options.
- Addressed to Options
- Individual
Excel has one row per individual with contact information, Member information, etc.
Labels are addressed one per person
- Family
Excel has one row per family with a Label Name (Thomas Faulk and Family), the Head of Household First and Last Name, the Family Address, HOH Email Address, and Spouse Email Address.
If you select Address Labels, one label per family will print.
See also
- Family Members
Labels are addressed one per family
Excel has one row for each family member of the individuals represented in your list with contact information, etc.
Note
When you select Family Members in the dialog box, the file will be sorted by Family Name first and then by Family ID. This gives you one line per family member and the family members will be together by their position in the family (Primary, Secondary and then Child), even when there is a blended family in which the member have different last names.
The Secondary Adults and Children are sorted in descending order by age. There is a column named Family Position ID that is used to create this sort. If you change the sort and need to get back to the original sort, just sort by FamilyName, then Family ID and then by the Family Position ID.
By the way, the Family Name, which is displayed in this export, is the last name of the Head of Household. This is calculated by the system and will be either the male Primary Adult, or the female Primary Adult if there is no male. If there are no Primary Adults in the family, the oldest child will be the Head of Household.
- Couple (both)
Excel has one row per couple with couples combined if both of them are included in the original list
Labels are addressed to the couple only if both parties are in the search results
- Couple (either)
Excel has one row per couple with couples combined even if both of them are not included in the original list
Labels are addressed to the couple (if both are in the database) even if only one of them is in the search results
- Parents Of
One row or label per person
Adds
Parents Ofin front of the name of whoever is in the search results.If the person is an adult, the label will read like an Individual one (see Individual above)
- Group by Address
This option applies to the Contact Report and the labels only. It will use the last name of the Head of Household and include the first names of anyone included in the results.
See also
- Label Options
- Use Titles
Uses Mr. Ms., Dr. etc. (the title on the person’s record, if any). When addressed to Couples, it will be Mr. and Mrs.
- Sort by Zip
Sorts the labels by the zip.
- Include Phone
This adds the phone number to the bottom right on mailing labels.
- Use Mail Flags
When checked, this will not include anyone with Do Not Mail or Bad Address flags set on their record. This flag will also apply when selecting the Excel Export for individuals.
- Skip # of Labels
Allows you to start the printing after skipping a specified # of labels (for Avery labels)
Involvement Attendance
- Recent Absents Report
See also
- Weekly Meeting Attendance
See also
- Recent Attendance Report
See also
- Attendance Percentages
See also
Custom Reports (code icon)
This section is where you can access existing Custom Reports, SQL Reports, and Python Reports. This is also where an Admin or user with Design role can create new Custom Reports.
Custom Reports
All Custom Reports are automatically added to the Blue Toolbar and will be listed under the heading Custom Reports. You have the option to restrict Custom Reports to a specific Involvement. These will only display on the Blue Toolbar when you are viewing that Involvement.
A link for Create New Custom Report is at the bottom of the list of existing reports, but it visible only to those with the Admin or SpecialContentBasic role.
See also
SQL and Python Reports
SQL and Python reports are created, obviously, using either SQL or Python programming language, and can be added either to the Blue Toolbar or the main Reports menu. To help you take advantage of these wonderful types of reports, we have created some recipes for several of each of them. We have the code that you can copy and paste into your database, make any necessary modifications, and create your own SQL or Python reports without having to know that language.
Important
If any report or script contains protected information, such as Contributions, only someone with Finance role will see the report on the Blue Toolbar. Also, if a SQL or Python script specifically limits that script to a role, only users with that role can see the report on the Blue Toolbar.
Actions (gear icon)
Administrative
The following are available when viewing an Involvement. Some require special access roles.
- Sub-Group Management
This requires the user role Manage Groups in addition to Access. It will open the management page for sub-groups where a user can create, rename, delete sub-groups, and manage (add/remove) sub-group members.
See also
- Members Only Page
No special role is required, but this is accessible only by current members of the Involvement. This is where a class can post prayer requests, or any other information that class members need to view. Only a user who is a member of the Involvement can edit that page.
See also
- Try Registration
This link is used when you are setting up an online registration to allow you to test the registration and see what your registration will look like to your registrants.
See also
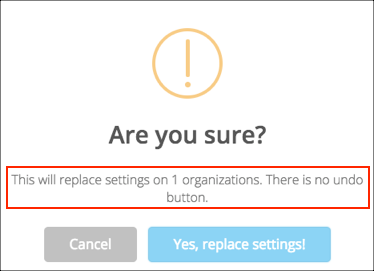
- Copy Settings
This lets you copy the Settings for the current Involvement and then paste them onto several other Involvements. If the Involvement is an online registration, it will copy all the registration settings under the Registration tabs – Registration, Fees, Questions, Messages as well as the Settings on the Settings tabs for any type of Involvement.
After clicking this link, go to Involvements > Manage > Search.
Filter for the Involvement where you want to paste the Settings.
Then select the Toolbar > Gear > Paste Settings.
This will open a prompt letting you know how many Involvements will be affected.
Answer Yes to paste the Settings from the first Involvement, onto the group of Involvements in your filtered list.
Another prompt will let you know when the Settings have been replaced.
- Child Involvement Management
This link takes you to the page where you can select Involvements in the same Division in order to make them Child Involvements of this Involvement, which will then become the Parent Involvements.
See also
- Delete Involvement
This requires a special Delete role that can be assigned only by someone from TouchPoint. Submit a Support Request if you feel you need this role.
Note
There is really no need to delete an Involvement as you can make it Inactive and then rename it and make it active when you need another Involvement.
- Repair Transactions
This is available only to Admins. It can be used if current members of an Involvement are not displaying correctly on the Meeting or roll sheet. This can happen during a conversion, but is rare. Submit a Support Request if you have a need for this and need help.
Contacts and Tasks
- Add Contact
This will open the Contact page where you can record the results of a Contact for everyone in the list.
See also
- Add Tasks
This will create an individual Task for each person you are viewing. If you are on an individual’s record, it will be a Task about that person. If you are on a list of people, it will create individual Tasks for each person.
See also
- Export Task Notes
This will open in Excel and contain the Name, Notes from any Tasks that are not protected by a role, and the date the Tasks was created.
Extra Values
- Add Extra Values
This opens a dialog box where you can create a Text type of Extra Value (the Field) and then enter the specific value for that person.
See also
- Delete Extra Values
This will delete whatever Extra Value you type into the dialog box.
- Extra Values Grid
This opens a page with everyone in you results / Involvement, indicating with
truein the column if an Extra Value is on their record.
Meeting Operations
When viewing a specific Meeting you have several Operations.
- Add Attendees From Tag
If you have a Tag of people you want to record as having attended the Meeting select this Tag.
- Add All Guests to Involvement
After adding all the guests to the meetings select this option to enroll each of these guests as members of the Involvement.
- Add Absents to Meeting
This will not mark people Present, it will create an absent record for everyone that is not marked present. This would be used if you were recording attendance early in the life of an Involvement, so that those who have never attended will be recorded as Absent. Normally, an absent member is not given an Absent flag until after he has attended for the first time.
See also
Meeting - Convert to Search
When viewing a Meeting you have the option to Convert to Search Builder the following types of people:
Attendees
Guests
Absentees
Registered Attending
Registered Regrets
Not Registered
Registered Attendances
Registered Absentees
UnRegistered Attendances
UnRegistered Absents
Checks/Trainings
If you are using the MinistrySafe or Protect My Ministry background check integration, you can request background checks in mass. From an Involvement, Search Builder search or a Tag, choose the appropriate option to Email for Consent. The pop up window will indicate how many people will be sent the email based on those that have email addresses on file. Submit with PII is not an option for this method. This section is only visible to those with the appropriate BackgroundCheck, BackgroundCheckRun or MinistrySafeClasses role.
The options under Checks/Trainings are listed in alphabetical order.
Users
Use this option to mass create MyData User accounts.
See also
Noted alphabetical order for Checks/Trainings options.