Involvement Member Dialog
- Member Dialog
This dialog box contains information relating to the Involvement member and their enrollment and attendance within that Involvement. This is also where you can edit and perform other functions relating to their Member Type, Sub-Groups, Fees, and Questions from an online registration. If you add the person manually to the Involvement you can also manually capture those answers from the online registration. The Questions and Sub-Groups* are editable. You can also create and manage sub-groups apart from online registrations.
Access the Member Dialog from one of these 2 locations:
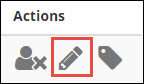
The Involvement page when viewing People, by clicking the Edit icon under the Actions column.
The individual person’s record under the Involvement > Current tab, by clicking the Member Type.
While this is called the Member Dialog, you also have access to limited information / actions when you click the member type for Previous Members, Guests, Pending Members, and Prospects.
The following tabs are across the top of the dialog box:
Member Data
Groups
Questions
Privacy
Extra Values
Each tab has action buttons at the bottom of the dialog box. The actions will be different for each tab. Also, some actions are protected by a user role.
Member Tab
- Attendance String
If attendance is recorded for the Involvement, the Attendance String will be at the top of the box. Clicking on the string opens the Attendance & Transaction History. If there is no attendance, you can access the Transaction History by clicking the Attendance link.
See also
- Member Type
The Member Type describes the role the person serves in that Involvement - Teacher, Member, Inreach Leader, etc. Use the drop down menu to change the Member Type. Click the blue Save button to save any changes you make. Do not confuse this Member Type with a person’s church Member Status.
See also
- Main Leader
This checkbox designates who is the main leader of the Involvement. This name will appear at the top of the page, under the name of the Involvement. There can only be 1 main leader per Involvement.
- Inactive Date
This date can be used as a reference for when a person will ‘rotate off’ from serving in that Involvement for a period of time. For example: Deacons serve actively for 3 years, become Inactive for a year, and then become active again.
See also
- Enrollment Date
This is the actual date the person was enrolled. However, that date can be changed if you are re-creating history. A member must have an enrollment date that pre-dates the meeting date in order to be recorded present as a member. Otherwise, they will be recorded as a guest.
See also
- Register Email
This is the email address that was entered when the person registered online. This may not necessarily match the email address on the person’s record. When emails are sent from the Involvement, and if there is a Register Email, emails will be sent to both addresses if they are different. That ensures that the person will receive email relating to that Involvement.
Important
If email is returned for someone, and the email address is not the same as the email on their people record, look in the Member Dialog. If they registered with a bad email, remove it from the Member Dialog. TouchPoint sends to both the personal email address as well as the Register Email, if you send emails from the Involvement, or from a search that includes that Involvement.
- Shirt Size
This is the subgroup associated with the registrant’s answer to the Shirt Size question.
- Notes
This will display the Extra Member Info from online registrations. It is basically a log of all online registrations for that person. You can add extra notes above the log.
- Transaction Amounts
If the Involvement is set up for online registration and has fees, these will display here. These also reflect any manual transactions that have been added. See Transaction under Action Buttons below.
- Fee
This is based on the basic fee for the registration, as well as the person’s selections during the registration.
- Paid
This is a real-time accounting of what has been paid for that person.
- Due
This is a real-time accounting how much is due for that person.
- Fee-Related Links
For Involvements with fees, there were be one or more links, depending on the type of online registration.
- View Transactions
This is a link that will open the Transactions Log showing the transactions for that person and that Involvement. If this is a Mission Trip, you will also see sections under the Transactions for Self-Support and Support from others.
- Paylink
This link can be copied and pasted into an email if someone as lost their paylink, and is used for a member to make subsequent payments online after paying a deposit.
- SupportLink
If the Involvement is a Mission Trip, this link can be copied and pasted into an email to allow someone to make a tax-deductible support donation for this person.
Groups Tab
If there are any Sub-Groups inside the Involvement, they will display here. You can check or uncheck the boxes to add or remove the member to/from the Sub-Groups. If the Involvement is an online registration, some of the groups will have been created from the answers given during the registration.
- Add New Sub-Group
You can also add a new sub-group while in the Member Dialog. Enter the name of the new group in the box labeled New Sub-Group and then click the green Add New button. This will automatically add the person whose Member Dialog you are viewing to the new group.
Sub-Groups can also be managed using Group Member Management or when using Update Members. Accessing Group Member Management requires the user role ManageGroups.
See also
Questions Tab
This will display the online registration questions, and the person’s answers. If you manually add a person to the Involvement, obviously, they will not have these questions and answers displaying. However, you will still want to capture their answers. Here is how to do that.
- Add Missing Questions
Click the green + Add Missing Questions button.
Answer Yes at the prompt.
Then, when you return to the Questions tab on the Member Dialog for that person, all of the questions from the registration will be listed.
Click Edit to enter the answers to the questions.
This will not include any questions for which sub-groups were created. You edit those on the Groups tab.
Note
Menu Items: If you use this type of Question in a registration, they create sub-groups. Therefore, they are not included when you click Add Questions. The details of these selections are stored on the Notes tab, so you can enter that information there.
Privacy Tab
An individual may decide to override his/her Global Privacy Settomgs by specifying different options per Involvement. The individual will update these in the mobile app, and those changes will be reflected here inside of the Involvement’s Member Dialog Box. Someone with the ManagePrivacy role may change these settings on the individual’s behalf or use this information for troubleshooting purposes. These preferences will also take priority over the Involvement Directory Settings, sharing more or less information than what is set as the default information on the Involvement Directory.
See also